Configure ServiceNow SSO with Workspace ONE Access
This a continuative article. To see all related articles, open the following page.
If all required users are synchronized with ServiceNow, we need to setup the single sign-on functionality between ServiceNow and Workspace ONE Access.
Just take a look how it will look like in the end:
Since there are no guides with the new ServiceNow Multi-Provider SSO Plugin (which is recommended by ServiceNow), we’ll show you how to configure the plugin.
First, you need to install the
Integration – Multiple Provider Single Sing-on Installer
This plugin will replace the “old” SAML plugin. So, do not despair if you do not find it – it is no longer there.
Before configuring the Multi Provider Plugin, we need to login to our Workspace ONE Access admin portal.
Then navigate to Catalog -> Web Apps -> Settings -> SAML Metadata and select the “copy URL” link.
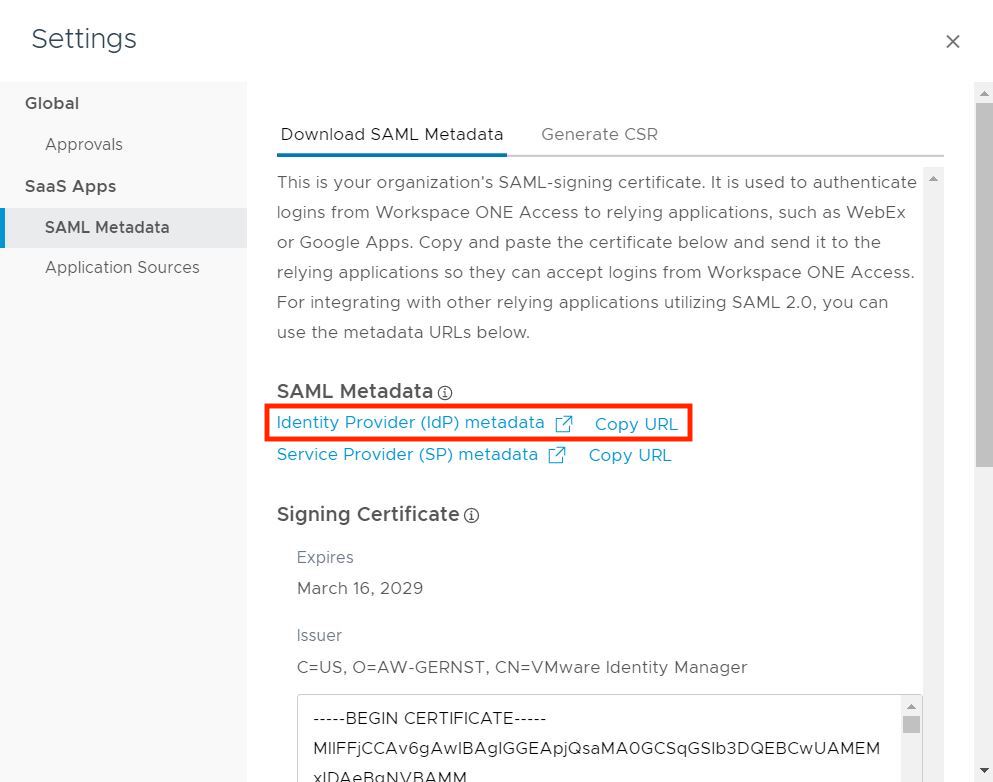
In your clipboard there should be something like
https://ACCESSINSTANCE.vidmpreview.com/SAAS/API/1.0/GET/metadata/idp.xmlWe now have the SAML metadata from our Workspace ONE Access environment and are able to configure the ServiceNow SSO plugin.
Open your ServiceNow admin console and navigate to “Multiple Provider SSO” -> “Identity Provider” and create a new SAML identity provider. Paste the URL to automatically fill the settings.
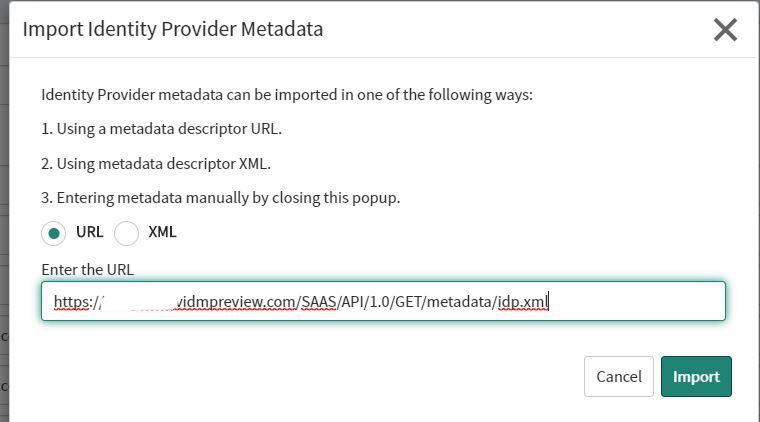
If you mis-clicked or typed a wrong URL into the first screen, you are able to select “Import IDP Metadata” from the “Related Links” menu.
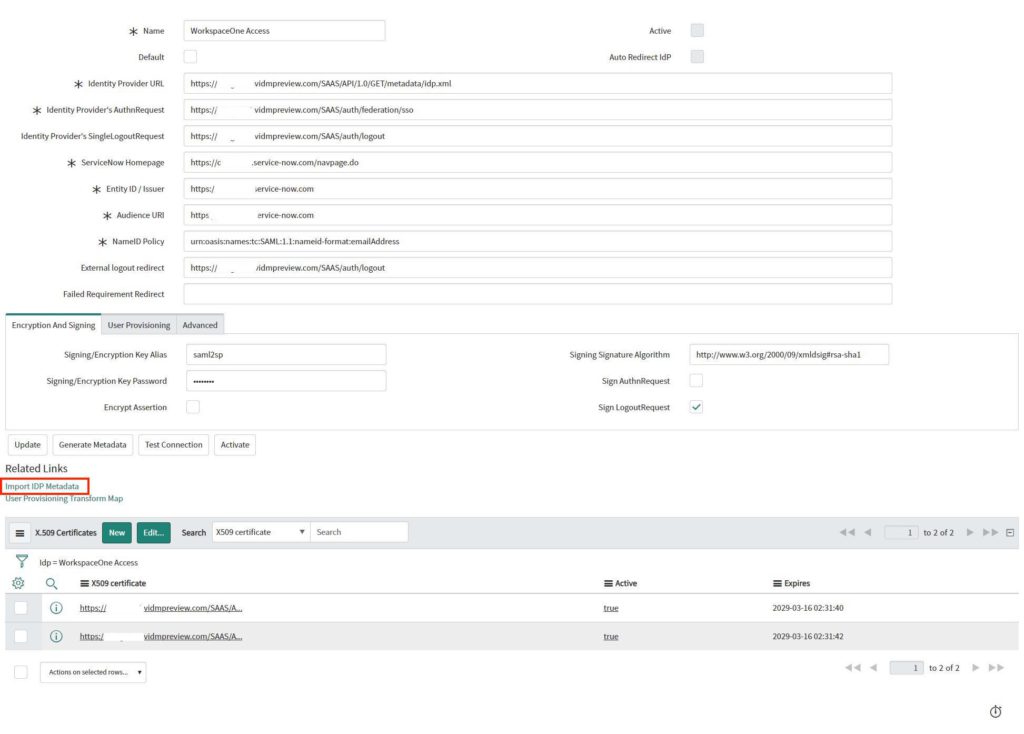
Before you can activate the provider, you need to test your connection. Only after the test was completed successfully will you be able to activate the provider.
Additional things to take a look at before activating the connection:
- Signing/Encryption Key Alias should be “saml2sp”
- Check “Sign LogoutRequest”
- Make sure the certificate is also selected – if not, add your certificate to the Identity Provider.
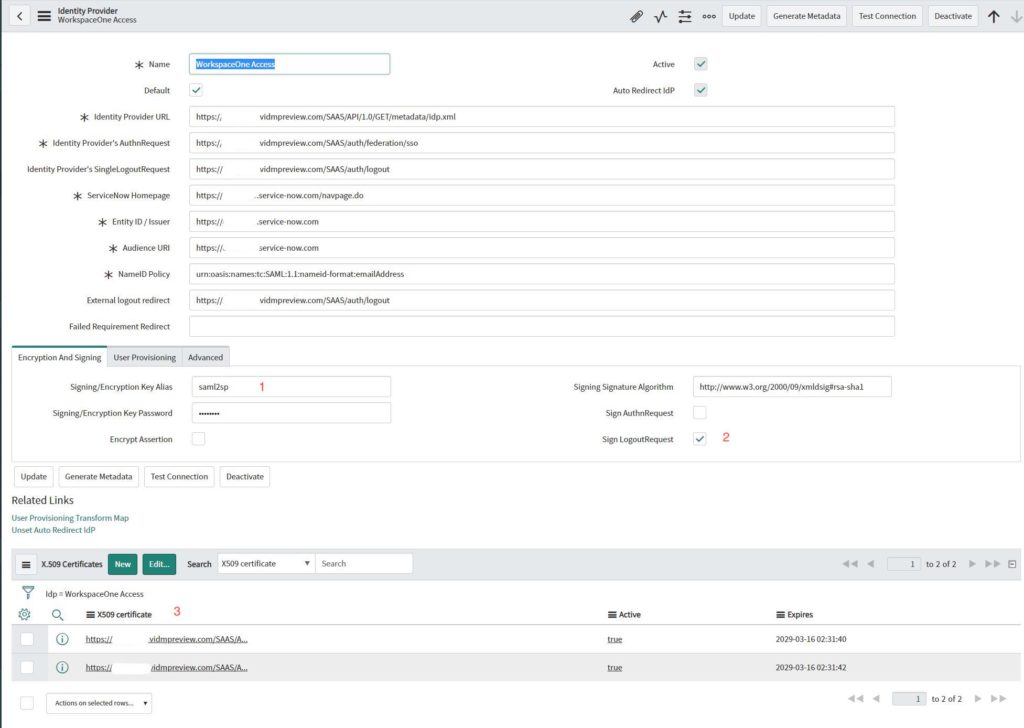
The advanced tab should be configured like this:
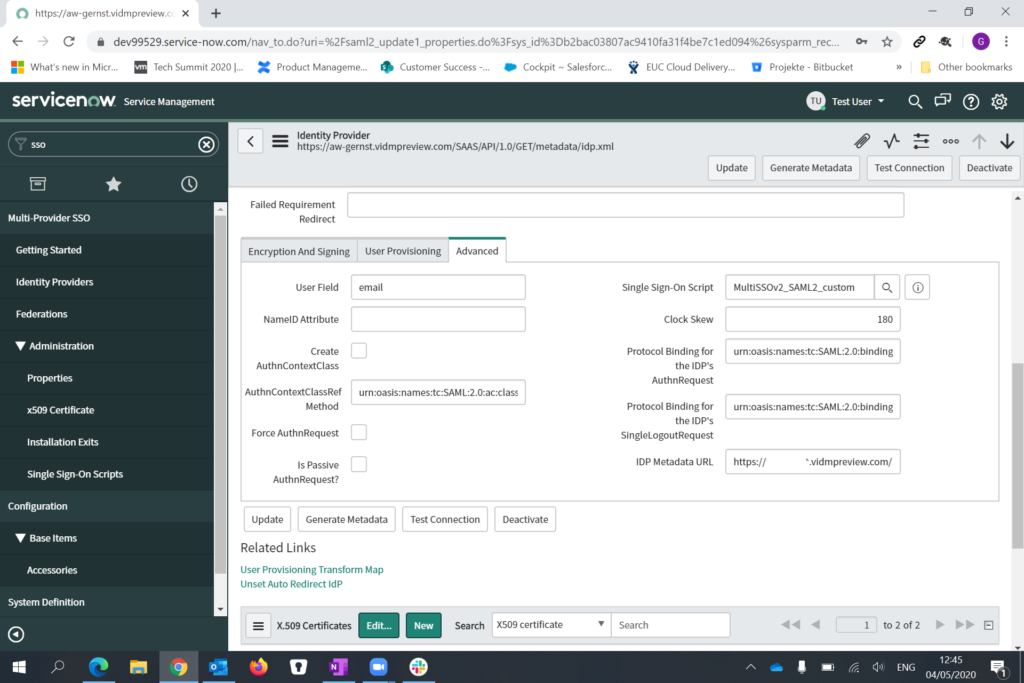
After you verified the settings and successfully tested the connection, activate the identify provider.
Next step is to verify the Multi Provider Exit scripts. Unfortunately, not all scripts are activated that are required to make it work.
Navigate to “Exit scripts” and adjust the filter:

We need to filter “Multi SSO” AND “SAML” since we have to make sure, that the old exit scripts from the SAML plugin are disabled.
You should now see the following entries:
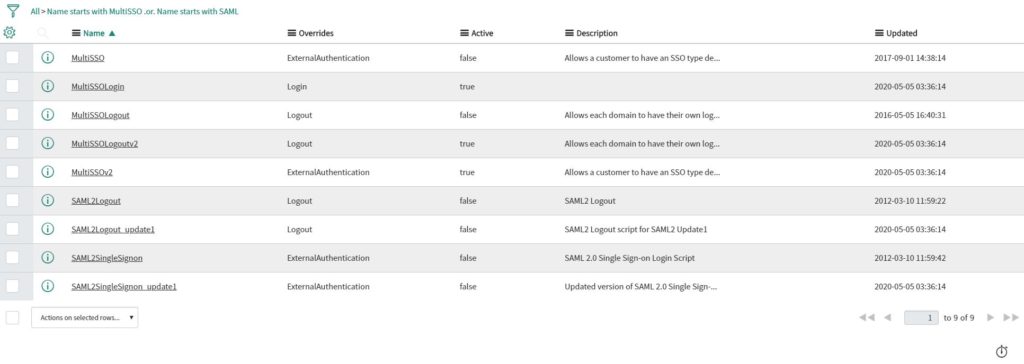
Please make sure that ALL “MultiSSO” scripts are ENABLED and a ALL “SAML” scripts are disabled.
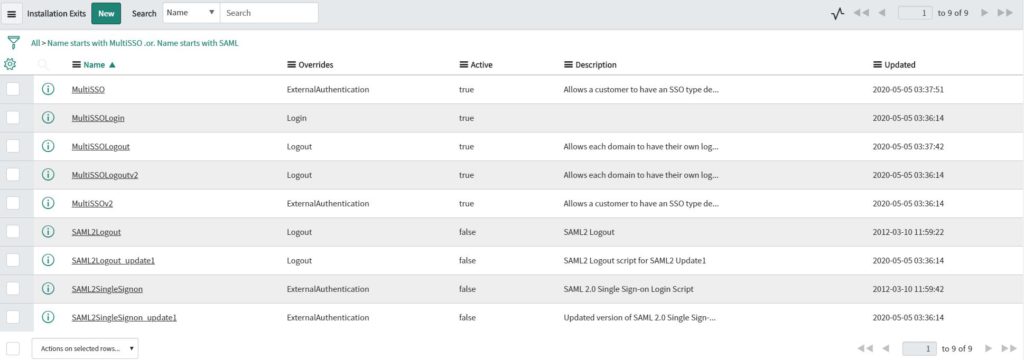
If you don’t activate all exit scripts, you are automatically redirected to the logout page.
In the ServiceNow debug log, you will see the following error:
java.lang.NullPointerException
Caused by error in Installation Exit: 'MultiSSO' at line 1

==> 1: gs.include("PrototypeServer");
2:
3: gs.include("MultiSSO_SAML2_Update1");
4: gs.include("MultiSSO_DigestedToken");
After everything is correctly configured, we can now enable the SSO.
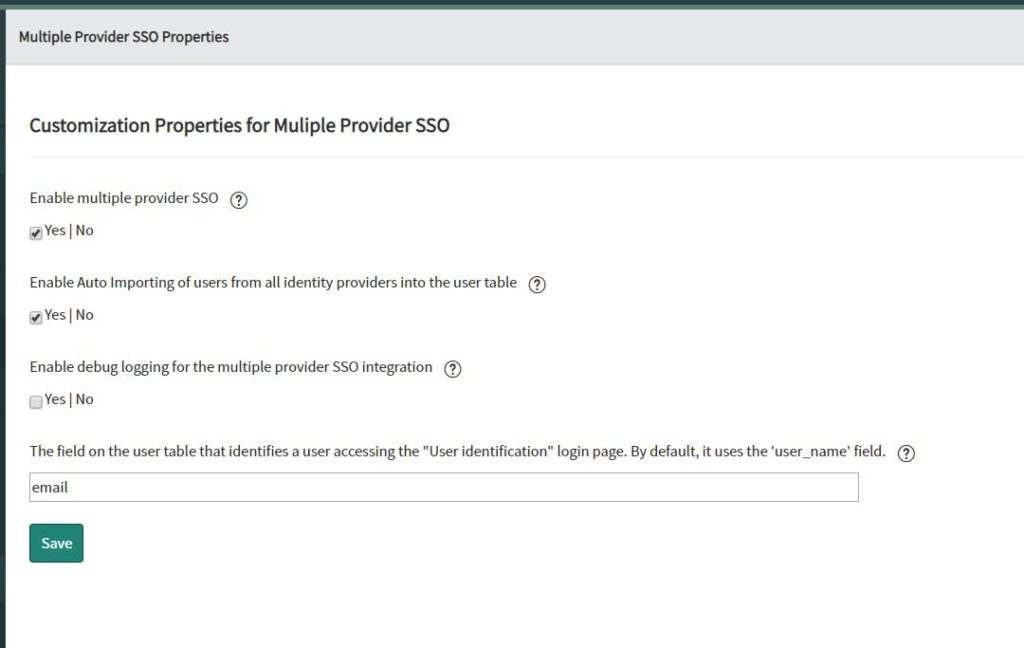
Navigate to “Multiple Provider SSO Properties” and enable the multiple provider SSO.
Now ServiceNow will automatically redirect all authentication requests to Workspace ONE Access.
But we are not ready yet – we need to configure the other side – Workspace ONE Access.
So, open the Workspace ONE Access admin portal and navigate to “Catalog -> Web Apps” and create a new Web App.
Search for “ServiceNow” since there is already a preconfigured app in the catalog.

After you selected ServiceNow, click “Next”.
Select “Manual” and type in the following settings
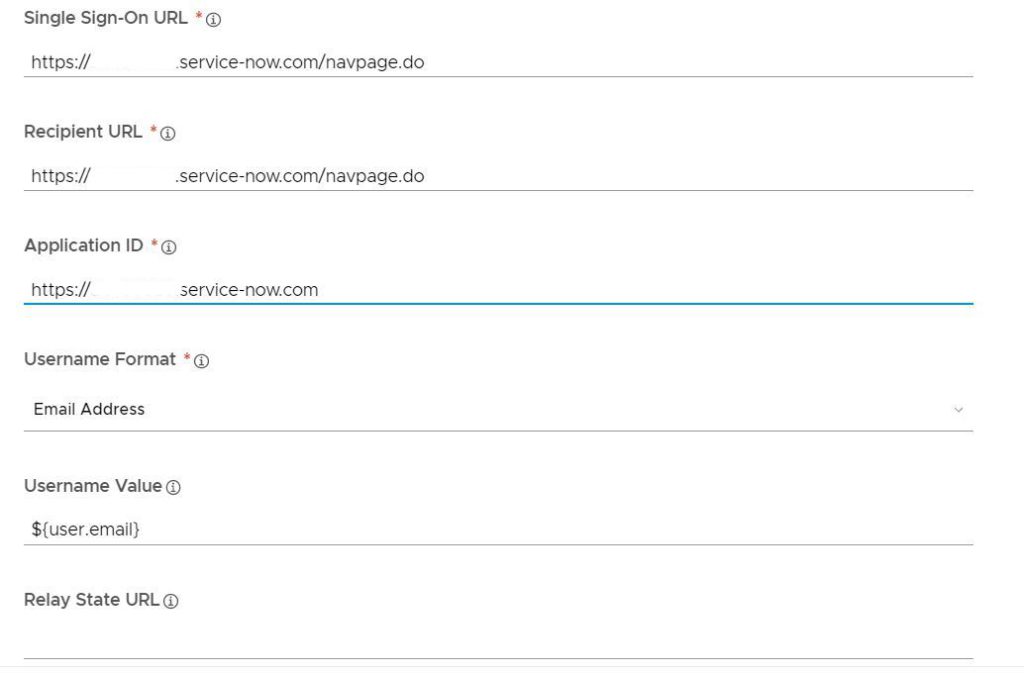
Type in your user domain as value (might be more than one).

Assign the application to your user group – in my case I deploy it to ALL USERS.

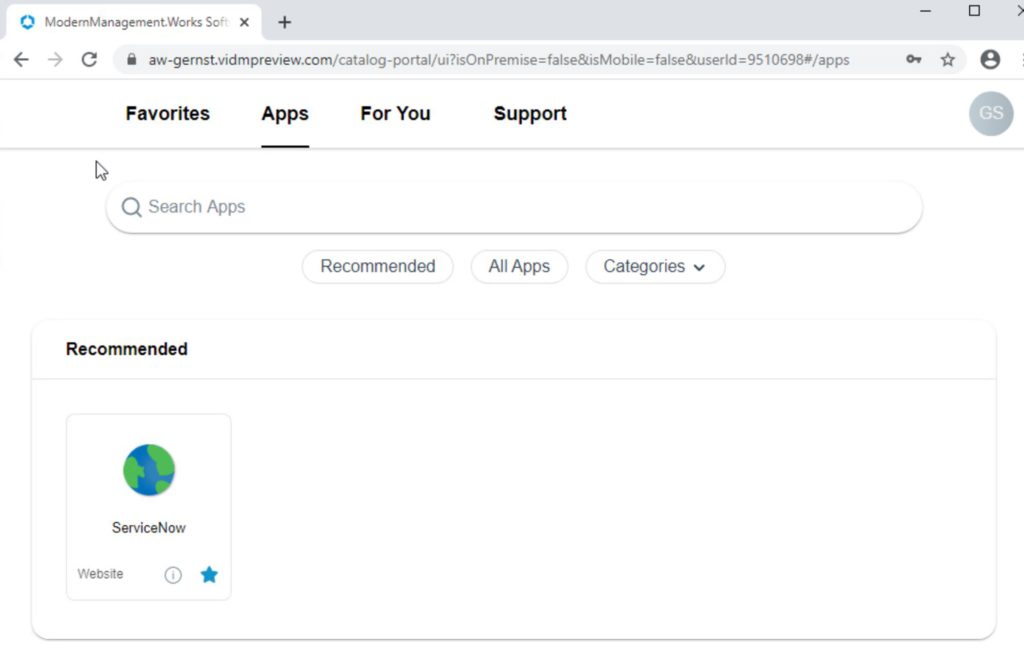
Right after the assignment, the App will be shown in the Catalog:
You are now able to try the sign in – you should be signed in and get to the ServiceNow Self-Service dashboard:
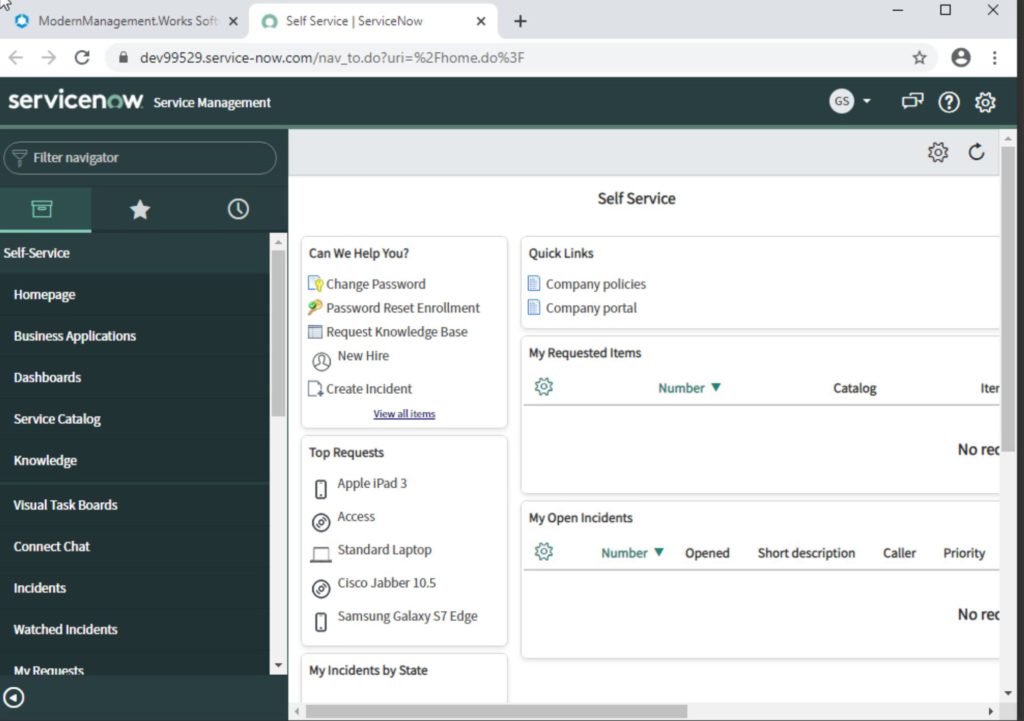
Congratulations – you have successfully deployed ServiceNow SSO with Workspace ONE Access!
Blog series overview
This blog post is part of a blog series. Please view also the other related posts: