Hybrid Modern Authentication with Omnissa Boxer – Part 3 – Configuration
- Part 1: Introduction
- Part 2: Prerequisites
- Part 3: Configuration
- Part 4: Special use cases and FAQ
- Part 5: Troubleshooting
Hybrid Modern Authentication configuration
The first thing to do before doing any of it is to make sure the Exchange organization is following the latest guidance on Hybridity; this is due to have a very strict support stance from Microsoft and how are things evolves over time. Once, certainty is acquired, you can proceed with the activation of the authentication on the Exchange organization. Also, you have to remember that the activation of Hybrid Modern Authentication impacts all services on Exchange, OWA and ECP excluded.
Check current status of Modern Authentication
Modern Authentication might already be activated, you can check by using this command:
Get-OrganizationConfig | fl OAuth*

OAuth2ClientProfileEnabled : True
Azure SPN Configuration
Azure has an application listing the services valid to deliver a token to. Normally, Hybrid Exchange Wizard configuration does this job for you, but you need to make sure that the list is up to date and correspond to your infrastructure.
First you need to list the URLs used in the Exchange organization.
Get-MapiVirtualDirectory | FL server,*url*
Get-WebServicesVirtualDirectory | FL server,*url*
Get-ClientAccessServer | fl Name, AutodiscoverServiceInternalUri
Get-OABVirtualDirectory | FL server,*url*
Get-AutodiscoverVirtualDirectory | FL server,*url*
Get-OutlookAnywhere | FL server,*hostname*
Then you need to check the list in Azure but first you need to connect to Azure using
Connect-MsolServiceThen run this command
Get-MsolServicePrincipal -AppPrincipalId 00000002-0000-0ff1-ce00-000000000000 | select -ExpandProperty ServicePrincipalNamesIf you don’t have this command in your PowerShell, you need to install the MSOnline module
Install-Module MSOnlineIf the FQDN used for the services are not in the list then you need to add them, like so:
$AzureSPNs = Get-MsolServicePrincipal -AppPrincipalId 00000002-0000-0ff1-ce00-000000000000
$AzureSPNs.ServicePrincipalnames.Add("https://activesync.domain.com/")
$AzureSPNs.ServicePrincipalnames.Add("https://ews.domain.com/")
Set-MSOLServicePrincipal -AppPrincipalId 00000002-0000-0ff1-ce00-000000000000 -ServicePrincipalNames $AzureSPNs.ServicePrincipalNames
Virtual directories authentication method
We now need to validate that oAuth is listed as an authentication method for every services.
Get-MapiVirtualDirectory | FL server,*url*,*auth*
Get-WebServicesVirtualDirectory | FL server,*url*,*oauth*
Get-OABVirtualDirectory | FL server,*url*,*oauth*
Get-AutoDiscoverVirtualDirectory | FL server,*oauth*
For each service, look for OAuth in the authentication method.
Get-WebServicesVirtualDirectory | FL server,*url*,*oauth*

Server               : EXCHANGESERVERNAME
InternalNLBBypassUrl :
InternalUrl          : https://ews.internal.lan/EWS/Exchange.asmx
ExternalUrl          : https://ews.domain.com/EWS/Exchange.asmx
OAuthAuthentication  : True
If oAuth is missing, you then need to add it as an authentication method also make sure it’s consistent across all servers.
You can use the following command to add oAuth Set-MapiVirtualDirectory, Set-WebServicesVirtualDirectory, Set-OABVirtualDirectory, and Set-AutodiscoverVirtualDirectory
ActiveSync virtual directory does not have by default authentication methods listed, you can, however, restrict the authentication methods for external and internal using Set-ActiveSyncVirtualDirectory, like so:
Set-ActiveSyncVirtualDirectory -Identity EXCHANGESERVERNAME\Microsoft-Server-ActiveSync -ExternalAuthenticationMethods "OAuth,Certificate"More info : Set-ActiveSyncVirtualDirectory (ExchangePowerShell) | Microsoft Learn
Validating EvoSTS object
EvoSTS object is the authentication server used by Office 365 and it is associated to the tenant so if the organization have multiple tenants linked then there will be multiple entries. The realm is the GUID of the Azure AD tenant allowing you to match the EvoSTS server entry and the tenant.
Open the Exchange Management Shell and run:
Get-AuthServer | where {$_.Name -like "EvoSts*"} | ft name,enabled,realmAs described in the prerequisite, Microsoft Exchange 2010 and 2007 cannot be in the organization, if there is, then EvoSTS server entry is not created.
If you cannot see any EvoSTS entry, you need to run the Hybrid Configuration Wizard.
To download the Hybrid Configuration wizard, go to https://aka.ms/HybridWizard
Enable Hybrid Modern Authentication
The command to run will depends on the version of exchange and on when the hybrid configuration was done, all commands are run in the Exchange Management Shell.
If the Exchange version is Exchange 2016 (CU18 or higher) or Exchange 2019 (CU7 or higher) and hybrid was configured with Hybrid Configuration Wizard downloaded after September 2020, you need to add the parameter DomainName, to the Set-AuthServer commands below
-DomainName "mycompany.onmicrosoft.com"You can get the domain name using this command
Get-AuthServer | where {$_.Name -like "EvoSts*"} | fl name,DomainNameIf Get-AuthServer return EvoSTS without GUID, run:
Set-AuthServer -Identity EvoSTS -IsDefaultAuthorizationEndpoint $trueOtherwise run
Set-AuthServer -Identity "EvoSTS - <GUID>" -IsDefaultAuthorizationEndpoint $trueFinally, configure the organization:
Set-OrganizationConfig -OAuth2ClientProfileEnabled $trueOmnissa Boxer configuration
While the authentication flow from a user standpoint is the same the configuration between an on-premises hosted mailbox and a cloud mailbox it differs at the endpoint to reach.
In both cases, the assignment, the restrictions and other non-related configuration can be common.
Add boxer application to Azure
In order for Omnissa Boxer to be allowed to request token, as described in the Scope section of part 1, it is necessary to add Omnisa Boxer application to Azure, you either need a first user to give consent or you can use the following link to grant consent for the organization, you will need to have admin rights in Azure to do so:
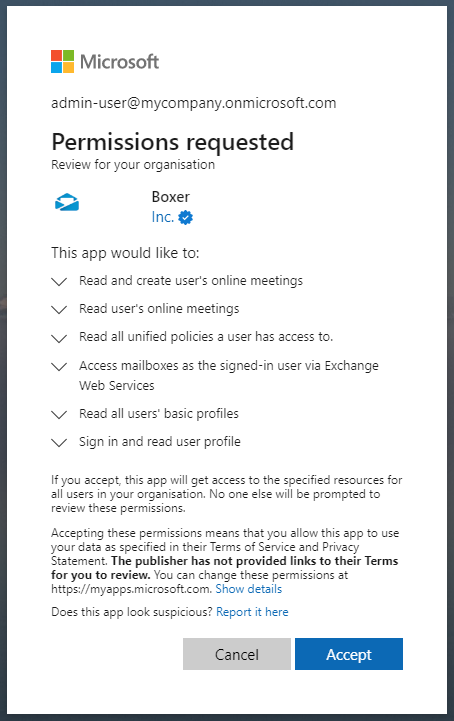
The successful result is a white page.
If the Omnissa Boxer app cannot be added, a custom application can be added to the Azure tenant by following this KB: Configuring Modern Authentication Flow with Azure in Workspace ONE Boxer (87610)
Endpoint Configuration
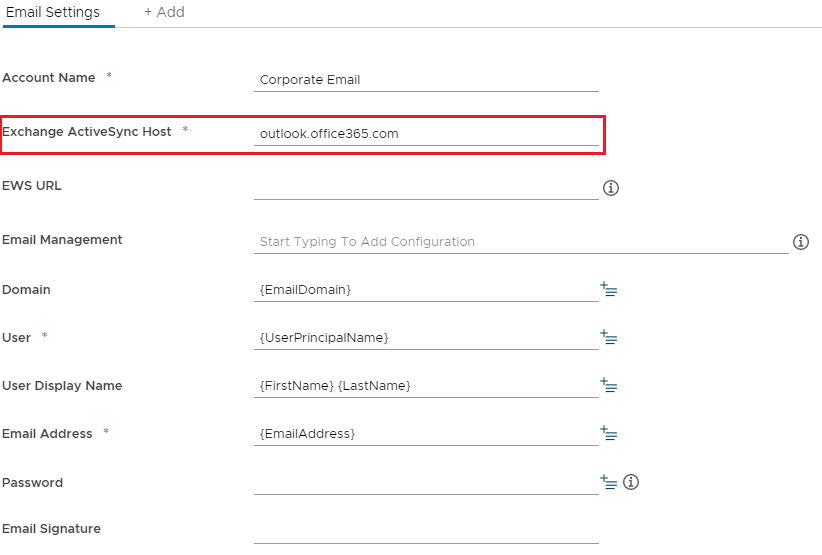
Cloud Mailbox
For cloud mailboxes, change Exchange ActiveSync Host to outlook.office365.com, you can go now the Enable Modern Authentication section below.
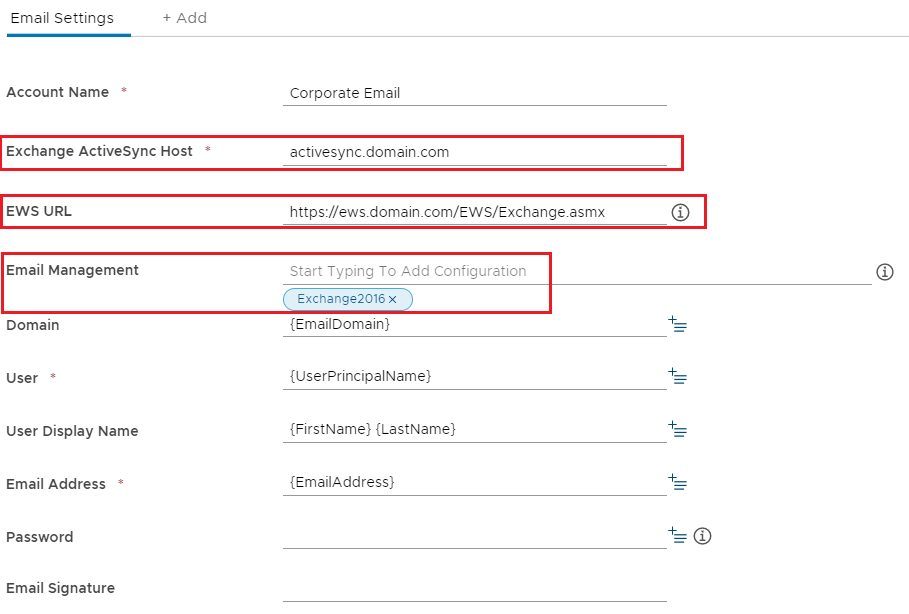
On-premises Mailbox
For on-premises mailbox few settings need to be configured, we will consider that Secure Email Gateway (SEG) is used as it is the best way to secure ActiveSync and avoid exposing Exchange to the internet.
Exchange ActiveSync Host: SEG FQDN or Exchange ActiveSync endpoint
EWS URL: URL to reach EWS always in the following format
https://<your_ews_domain>/EWS/Exchange.asmxIf EWS endpoint is not reachable via Internet, you can use per-app VPN, see part 4.
Email Management: Select the Secure Email Gateway configuration related.
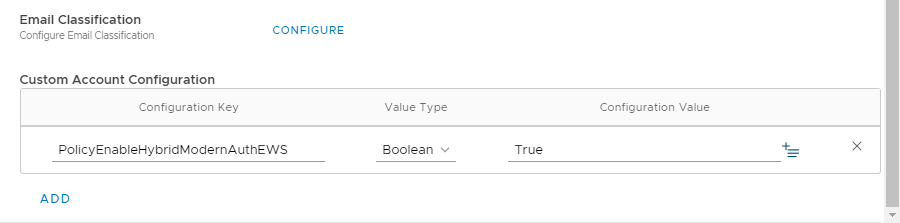
To support Shared Mailbox as well as other EWS features you need to add the following KVP, in the Custom Account Configuration:
| KVP Name | KVP Value Type | KVP Value |
|---|---|---|
| PolicyEnableHybridModernAuthEWS | Boolean | True |
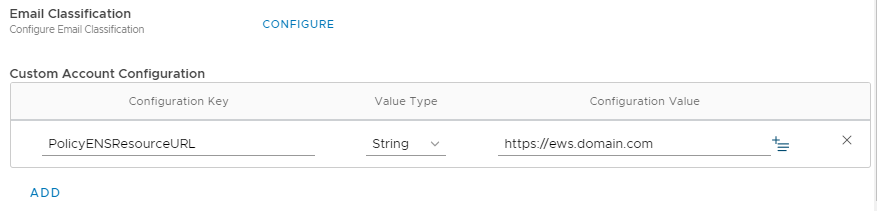
Email Notification Service (ENS)
If you are using ENS cloud, you need to add the following KVP in the Custom Account Configuration:
| KVP Name | KVP Value Type | KVP Value |
|---|---|---|
| PolicyENSResourceURL | String | https://ews.domain.com |
If you are using ENS on-premises, you have to modify the value “Resource” in the configuration file “web.config” located in “<installationfolder>\Email Notification Service\” to “https://ews.domain.com“
From
<add key="Resource" value="https://outlook.office365.com" />To
<add key="Resource" value="https://ews.domain.com" />Enable Modern Authentication
Once the endpoints are configured you need to need to enable Modern Authentication. To do so click on Edit next to the Authentication section.
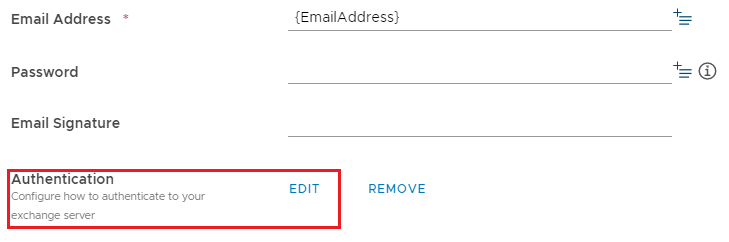
In the Authentication section, toggle the Modern Authentication button to green to enable Modern Authentication.
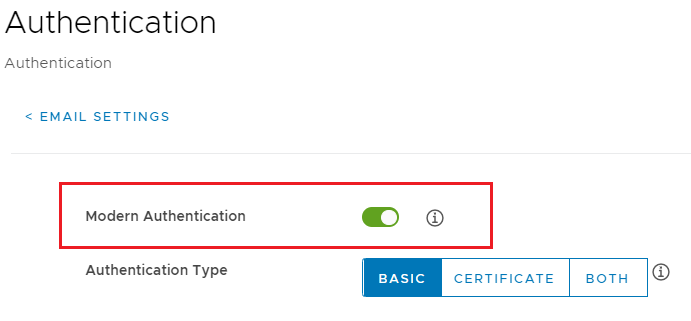
Configure any other settings required in the profile and save it.
Next: Part 4 – Special use cases and FAQ
vExpert, blogger and VMware champion. Worked as a Microsoft consultant for a partner before joining VMware via Airwatch in 2015.