Enrolling Zebra Devices with StageNow to Workspace ONE UEM
While enrolling in Workspace ONE UEM there are multiple way, especially with Zebra Devices. While QR-Code and Barcode in the Console are a nice option I want to show here a way that does not need any Server if you use Workspace ONE UEM in SaaS. While we saw some devices to not have the QR-Code Scanner option but having the Barcode reader, you can also enrol them with this flow here. In this Blog I will show the following end to end.
- Adding a Wifi to the Device
- Downloading WS1 Hub
- Installing WS1 Hub
- Set Hub as Device Owner
- Set the Enrollment Config (Servername, OG, User etc.)
Determine Version of MX
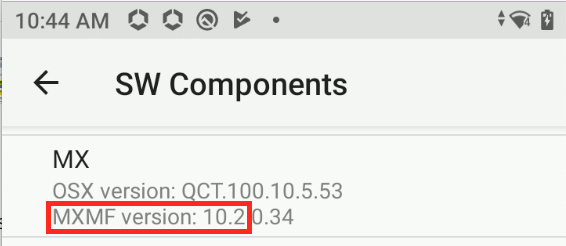
first we need to determin the MX Version , so we can be sure we create the Barcodes for the correct version. Go to the Settings App, select the “About phone” and Click to “SW Components”.
Scroll down to “MX” , there you see the Version of MXMF, that should match with the Version you select in StageNow. In my Case it is 10.2 , so I have to use MX10.2 to create the Barcodes.
Create the Barcode in Stage Now
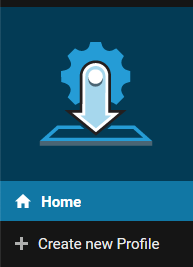
To create the Barcodes you can use StagNow, once installed and opened, you have a option to “Create new Profile”:
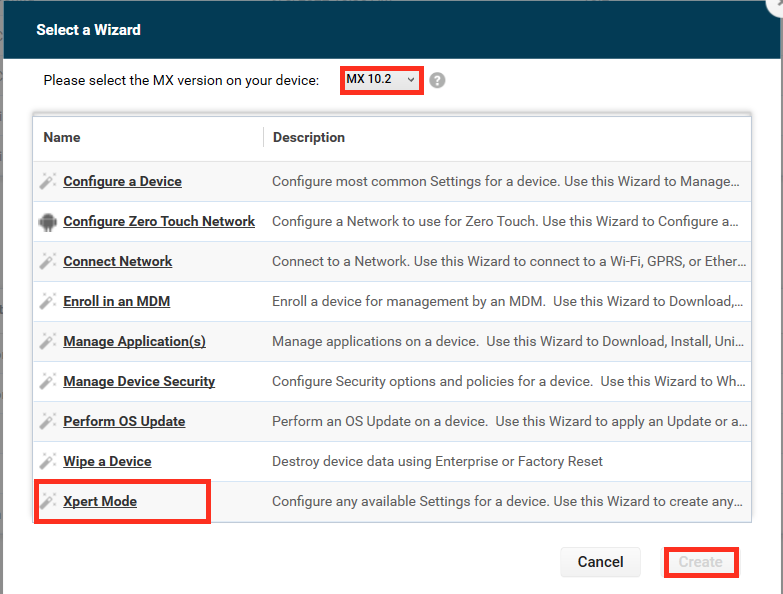
First of all, Select the MX Version of the Device, then Select the “Xpert Mode” and Click to “Create”:
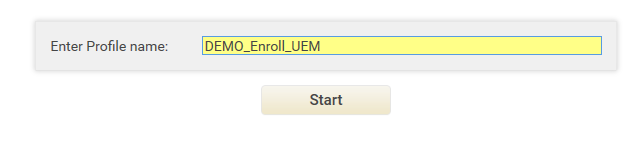
Give the Profile a name :
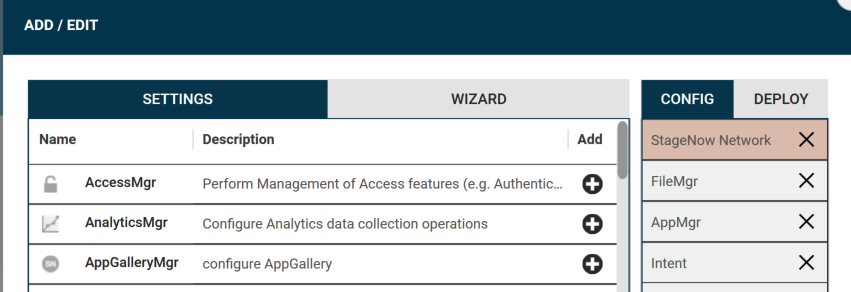
Add the following Settings / Wizards to the Profile in exact that order :
– StageNow Network (Wizard)
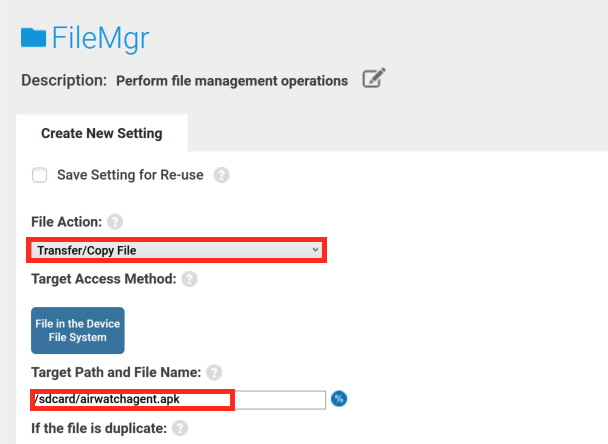
– FileMgr (Settings)
– AppMgr (Settings)
– Intent (Settings)
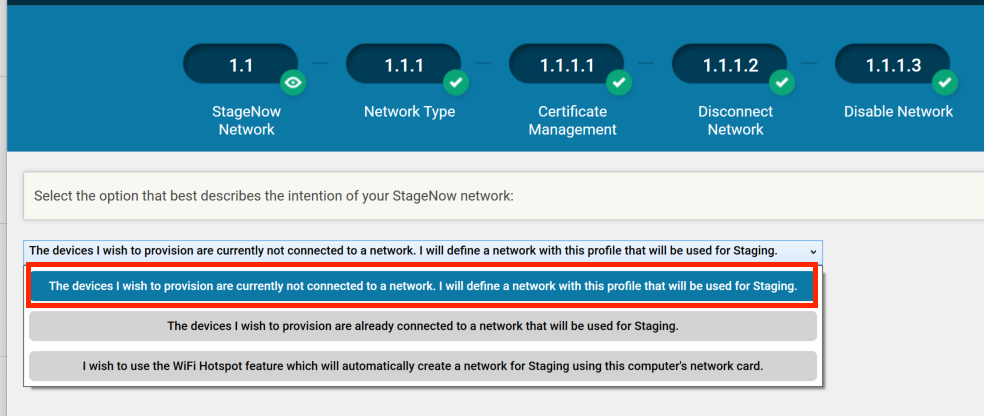
No, first configure the Wifi, as our device is not connected and we want to add some Wifi , just select that settings:
As my Staging Wifi is with Password (WPA2/TKIP) I do not need a Certificate and Select “no”:

As I do not have a Network Connection on a new Device select “NO”

As there are no Existing Network Connections , so I do not want to disconnect anything, so select “NO”

In the “Add Network” Section select “YES” to add a Wi-Fi Network:

in the Settings of this section you have to Specify the SSID of the Wi-Fi and the Security mode of the Wi-Fi (in my Case “Personal” , “WPA/WPA2” with “TKIP” )

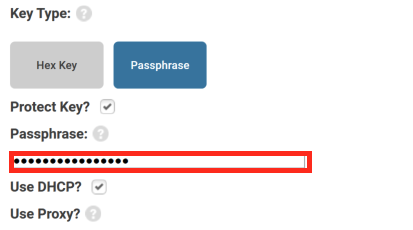
In the “Passphrase” Field put in your Wi-Fi Password , if you need aditional Network Settings , you can configure them here as well.
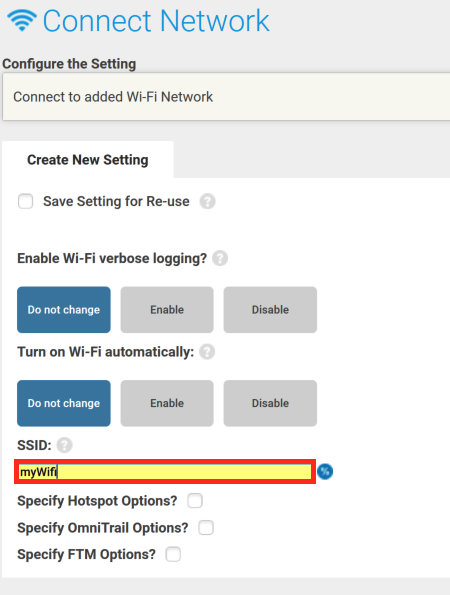
In the “Connect Network” section you can specify the SSID of the network you want to connect , it it is the network you just added it will already be pre-filled:
Now, as we have Wifi configured and Connected we can Download the Hub to the Device.
In the “FileMgr” options Select the Action “Transfer/Copy File” with the Target “/sdcard/airwatchagent.apk” , once done , scroll down:
Click to the 3 dots:
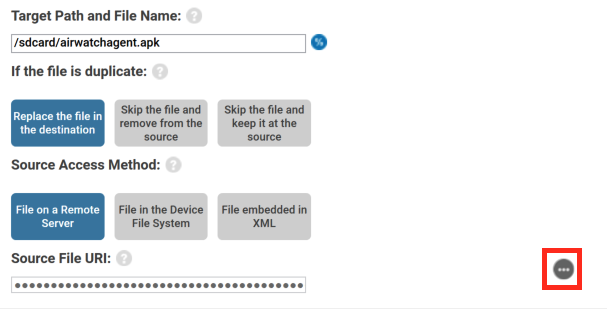
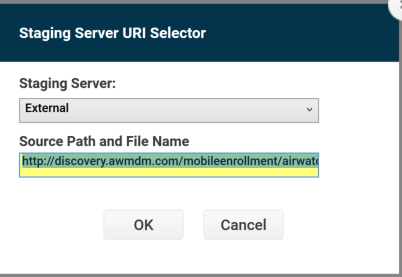
Make sure you select External and enter the path for download. I used the following link which is hosting the latest GA Hub : “https://discovery.awmdm.com/mobileenrollment/airwatchagent.apk”
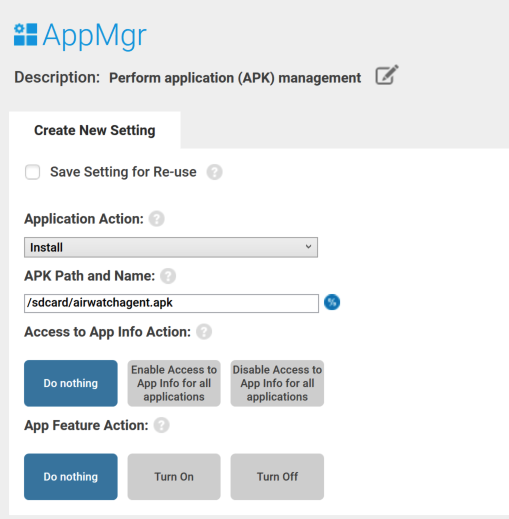
Once Hub is Copied over to the Device , we can install the App. In the “AppMgr” section specify the Action “Install” and in the APK Path (“/sdcard/Airwatchagent.apk).
After the installation we want to set the Hub as Device Owner and also apply the config, in my case it is the Group ID, Servername , Username and Password. So in the “Intent” Section select the Action “Enroll a Device Owner” , Enter the Package Name “com.airwatch.androidagent” and the Class Name “com.airwatch.agent.DeviceAdministratorReceiver” .
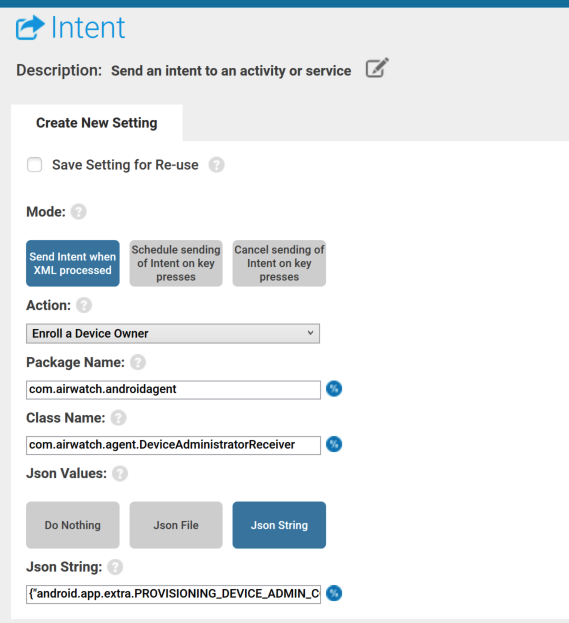
With this settings you have set Hub as Device Owner , but as I want to apply the config as well select “Json String” and and add directly the following Json to the “Json String” :
{"android.app.extra.PROVISIONING_DEVICE_ADMIN_COMPONENT_NAME":"com.airwatch.androidagent/com.airwatch.agent.DeviceAdministratorReceiver","android.app.extra.PROVISIONING_SKIP_ENCRYPTION": false,"android.app.extra.PROVISIONING_ADMIN_EXTRAS_BUNDLE": {"serverurl":"dsxxx.awmdm.com","gid":"GroupID","un":"User","pw":"Password"}}
you just need to Update the red Values with your environment details.
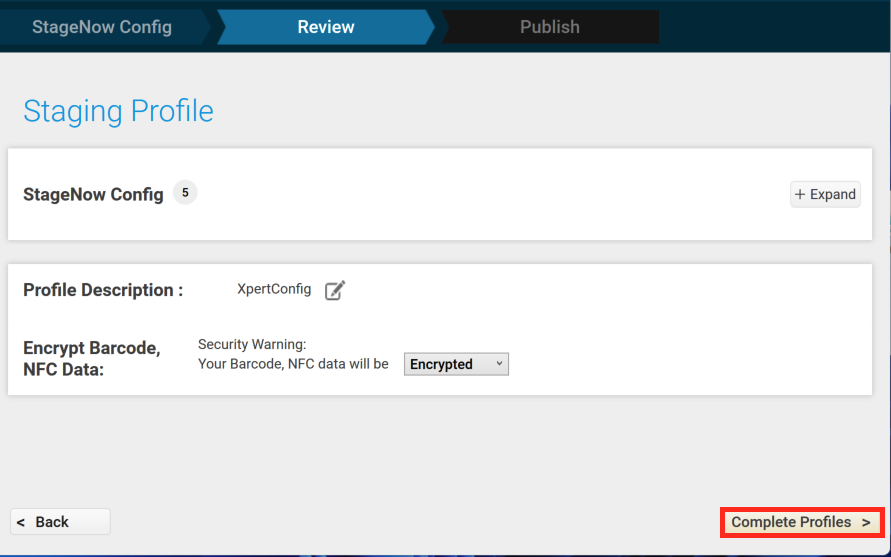
With that, you can “Complete” the Profile.
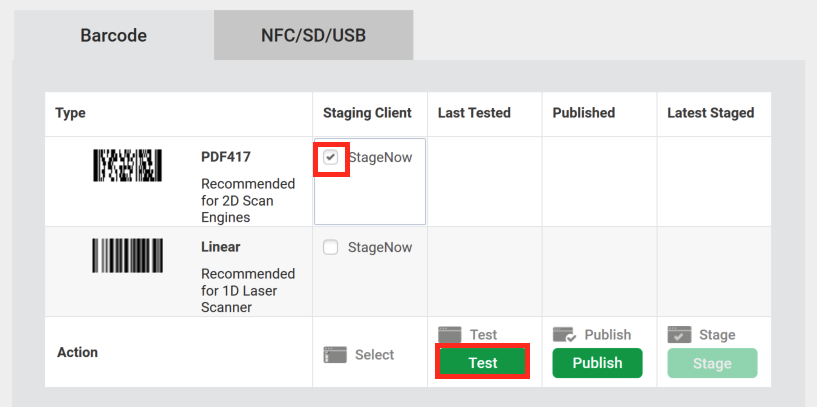
If you create the Barcodes select the “2D Scan” with the Sage Now Client and Click to “Test” to create the Barcodes
Note: Starting with Android 13 you have to select the “JS PDF417” as Zebra transitioned from XML to JS.
This is shown in the Screenshot below:
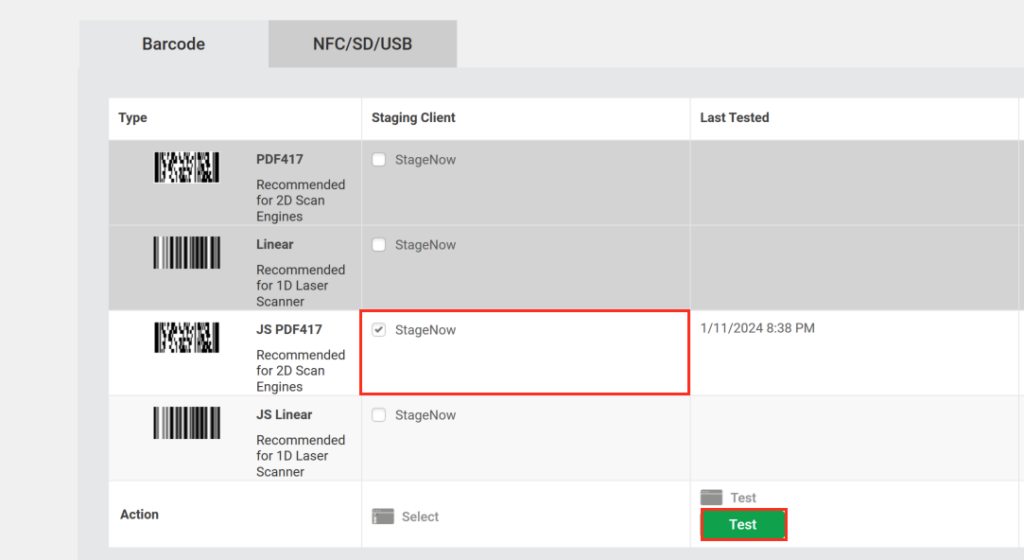
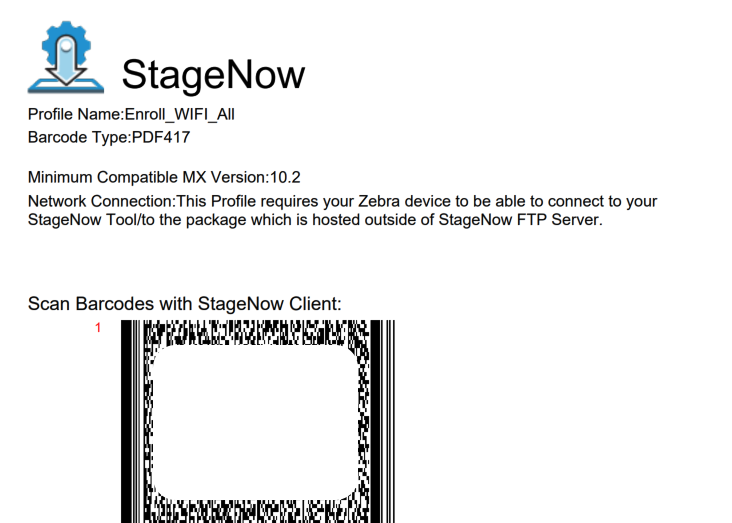
Finally you see the StageNow Barcodes as a PDF and can start on Enrolling the Device.
Video of the StageNow Barcode Generation
While the above steps are in detail and you can copy in the required Data , I also did a Overview video covering the same:
The Enrollment flow on the Device
To provide an overview on how it look at the device I created a video on this.this was a TC26 from Zebra
Note: I used the Hub APK, but I installed the MX Service via Managed Google Play based on a Smart-group Automatically once the Enrollment is finished. You could also Use the APF File with the Included MX Services.
vExpert, blogger and VMware & Omnissa champion. Worked 10 years as a Architect for a partner before joining VMware in 2017. Moved to Omnissa in 2024.
John
I followed this guide successfully but wanted to note that the public-facing Airwatch Download link for the agent fails if you use it as advertised here. It only worked when I used “https” instead of “http”
Patrick Zoeller
Thanks John for calling it out, yes, in the meantime it needs to be HTTPS. I just added a note as the Blog is from 2022 , there the http was working fine and was redirecting to https automatically
Erik
Great blog but i noticed once i get my device enrolled into ws1 many of the products that worked before error out with messages like ALL_FIle_Access_Permission_not_granted
Patrick Zoeller
please have a look here: https://kb.omnissa.com/s/article/85573