Intelligent Hub Verify and Authenticator App (SaaS & 2209 On-Premises WS1 Access)
Intelligent Hub Verify and Authenticator App (SaaS & 2209 On-Premises WS1 Access):
VMware verify will be EOL from Oct 2022 and VMware Verify app will not be available in the App store. This guide is to help those who are planning to use MFA or like to migrate from VMware verify to Intelligent Hub verify or any of your favourite Authenticator apps (google authenticator, Microsoft Authenticator, etc).
For more info, please read below VMware KB article
Workspace ONE Access: VMware Verify End-Of-Life
This tutorial looks at several initial scenarios to set up Intelligent Hub Verify or Third-party Authenticator App or migrate from VMware Verify to Verify (Intelligent Hub). The scenarios listed are for On-Premises 2209 WS1 Access and SaaS customers using VMware Workspace® ONE and depending on where the customer is on their journey.
This tutorial is intended for IT administrators and product evaluators who are familiar with Workspace ONE UEM and Workspace ONE Access. Familiarity with the virtual environment, Active Directory, identity management, and directory services is assumed.
Activate Hub Services:
Activate Hub Services within the Workspace ONE UEM console. This allows you to use the catalog services inside the Intelligent Hub application. If you have not enabled Hub services, then you can follow my below blog to enable Hub services.
Activate Verify (Intelligent Hub) Authentication Method:
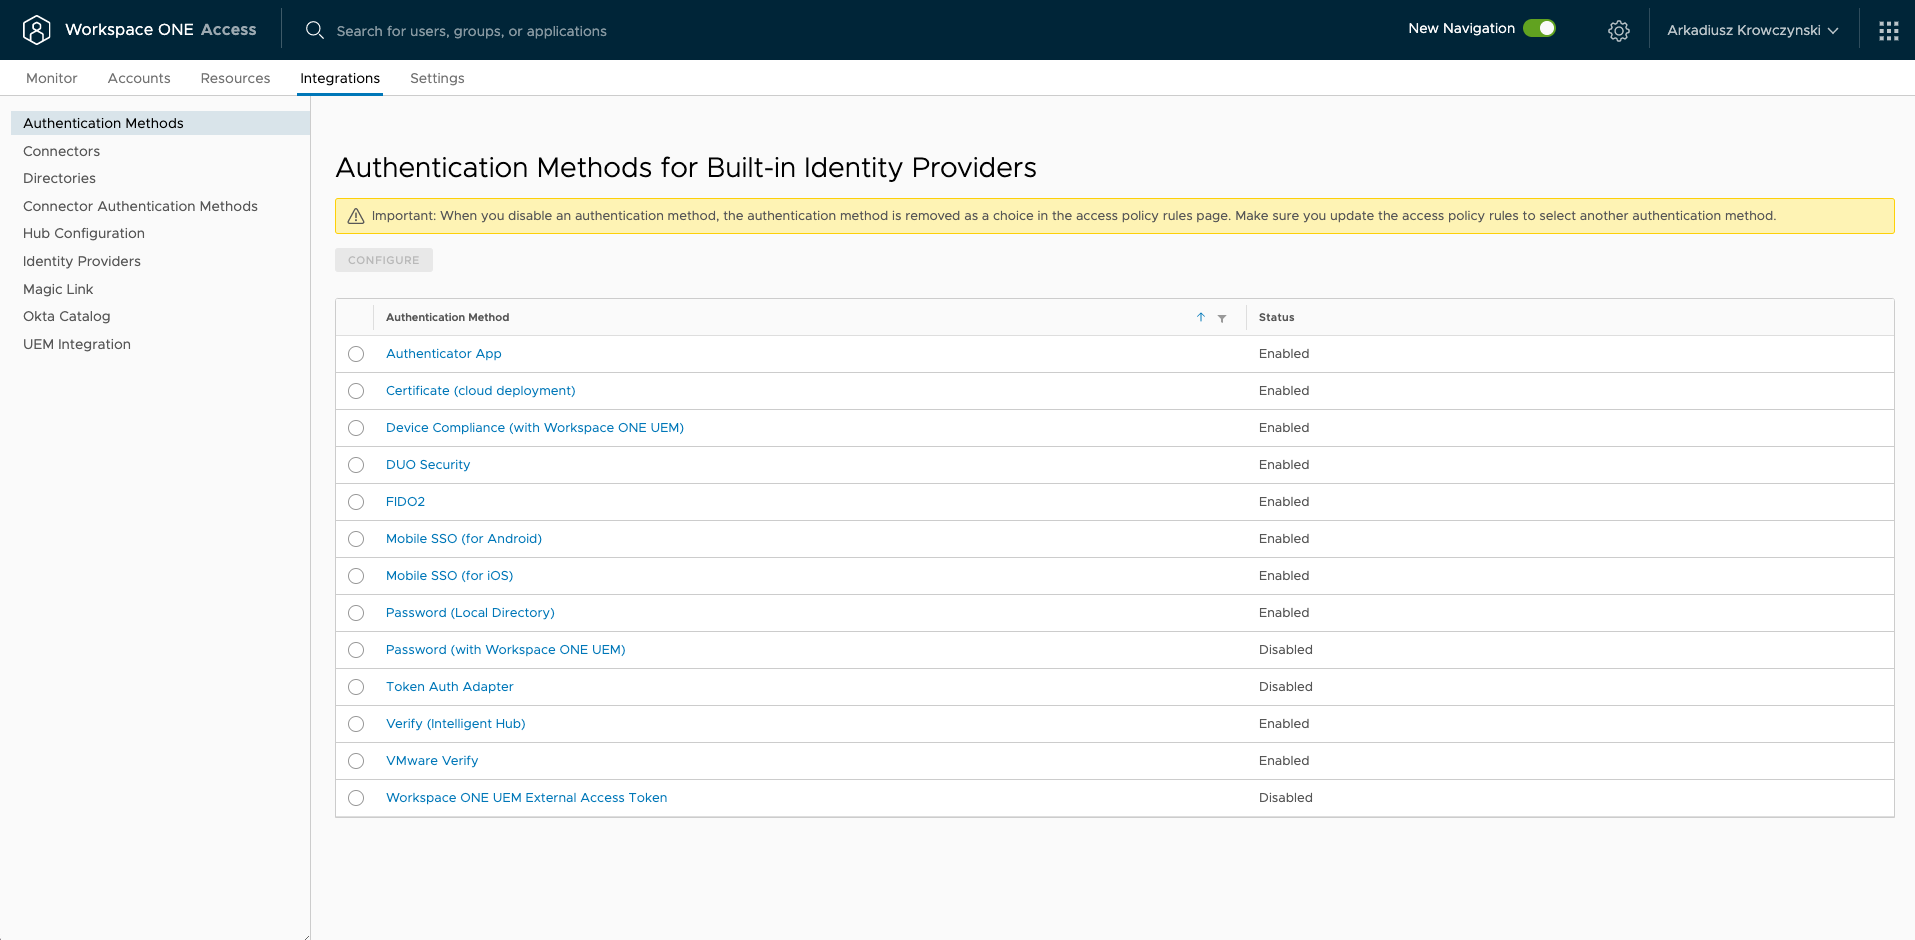
You must activate the Verify (Intelligent Hub) authentication method in the Workspace ONE Access admin console before you can add it to your access policy.
In the Workspace ONE Access admin console, navigate to Identity & Access Management > Authentication Methods. Click the edit icon for Verify (Intelligent Hub).
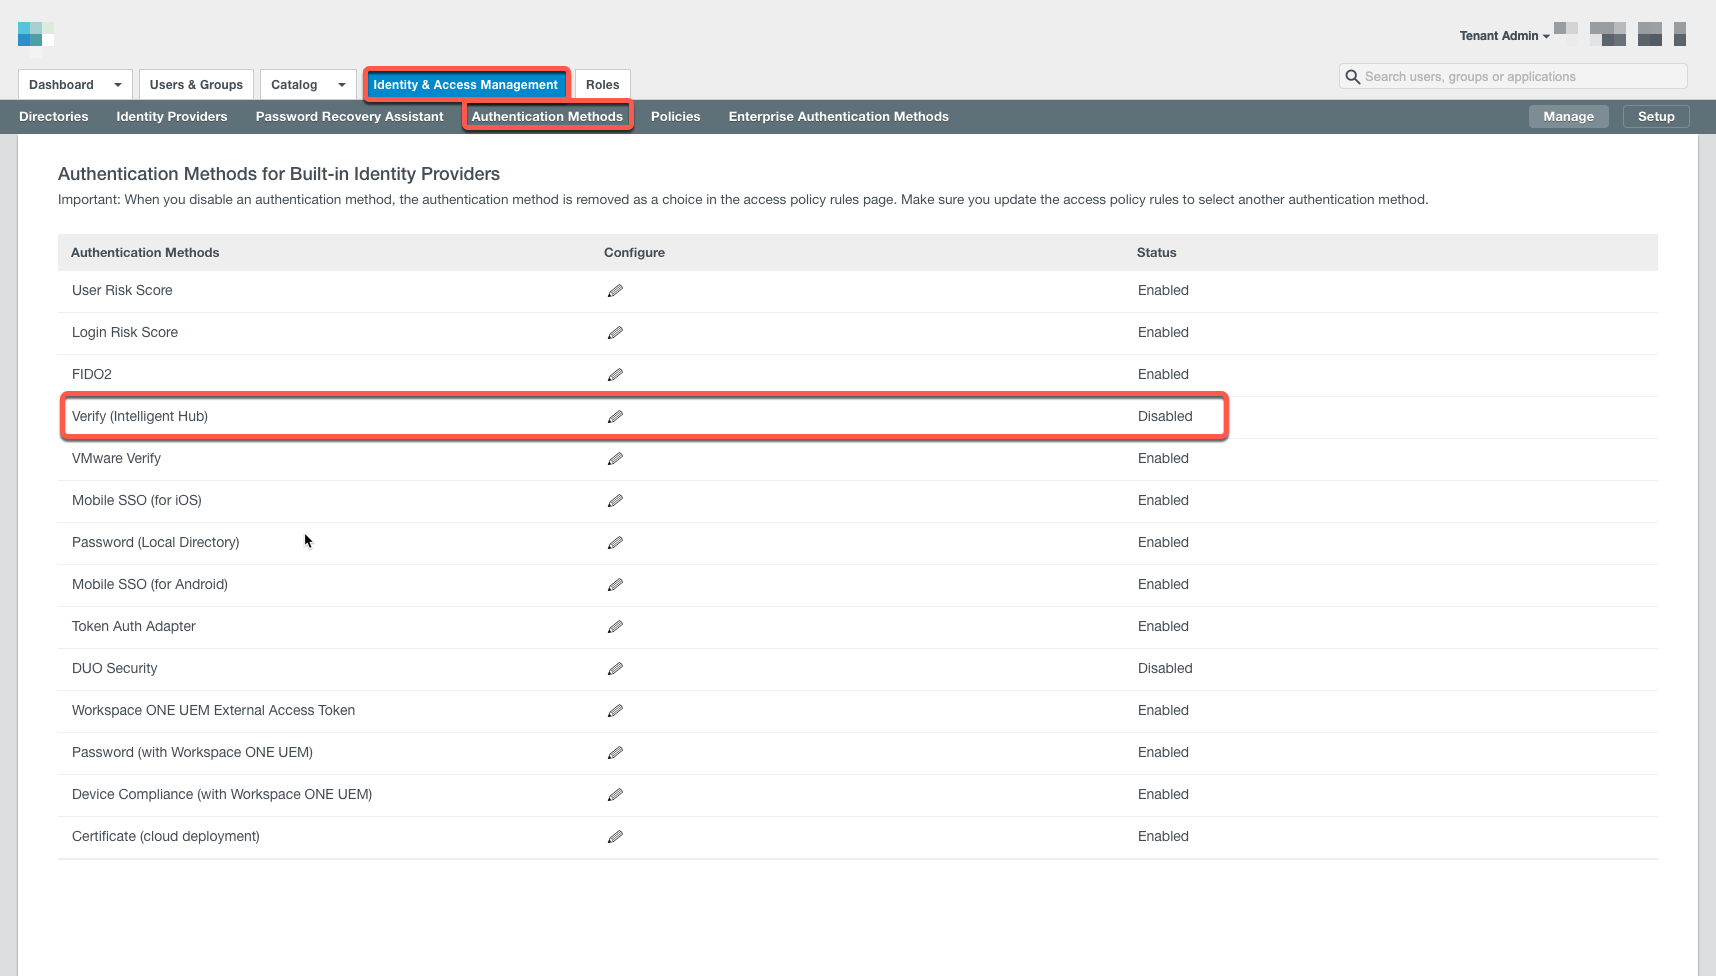
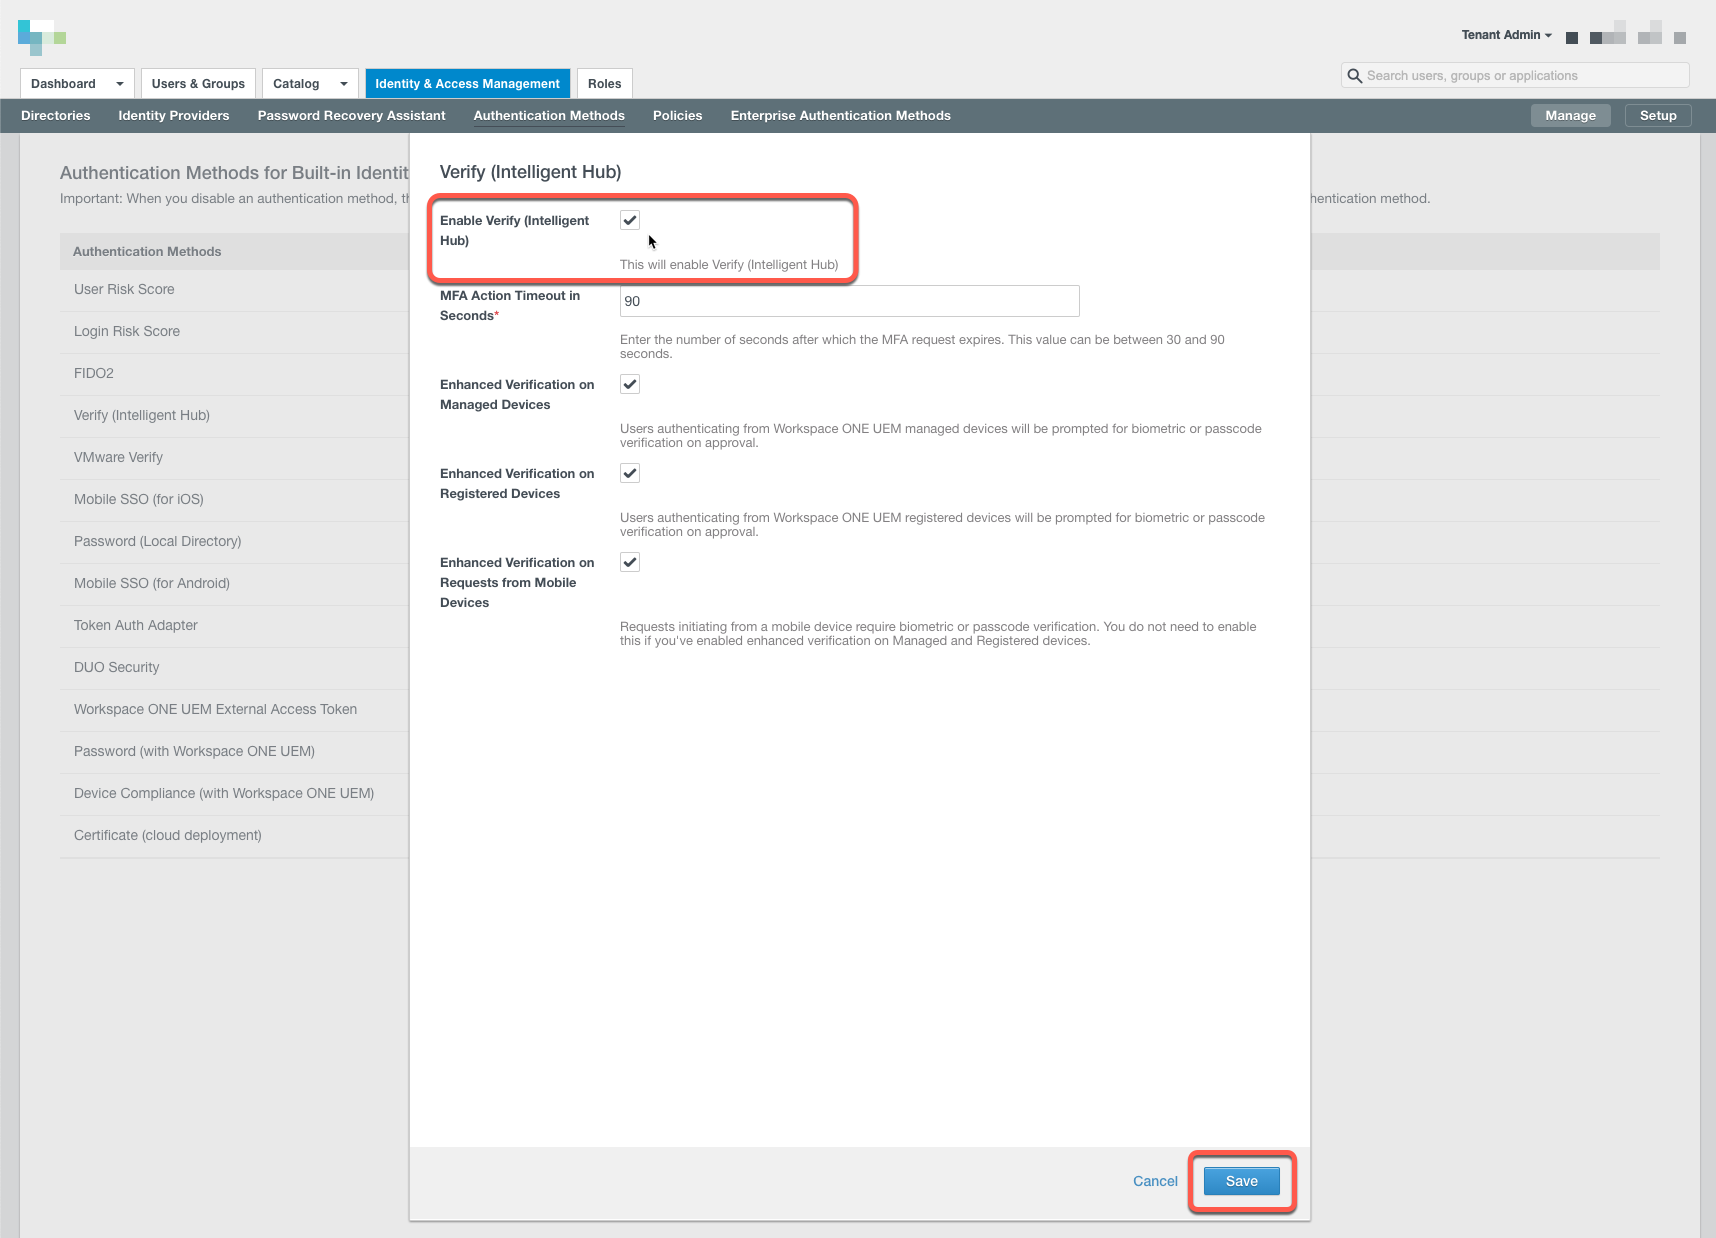
Select the check box Enable Verify (Intelligent Hub). Click Save.
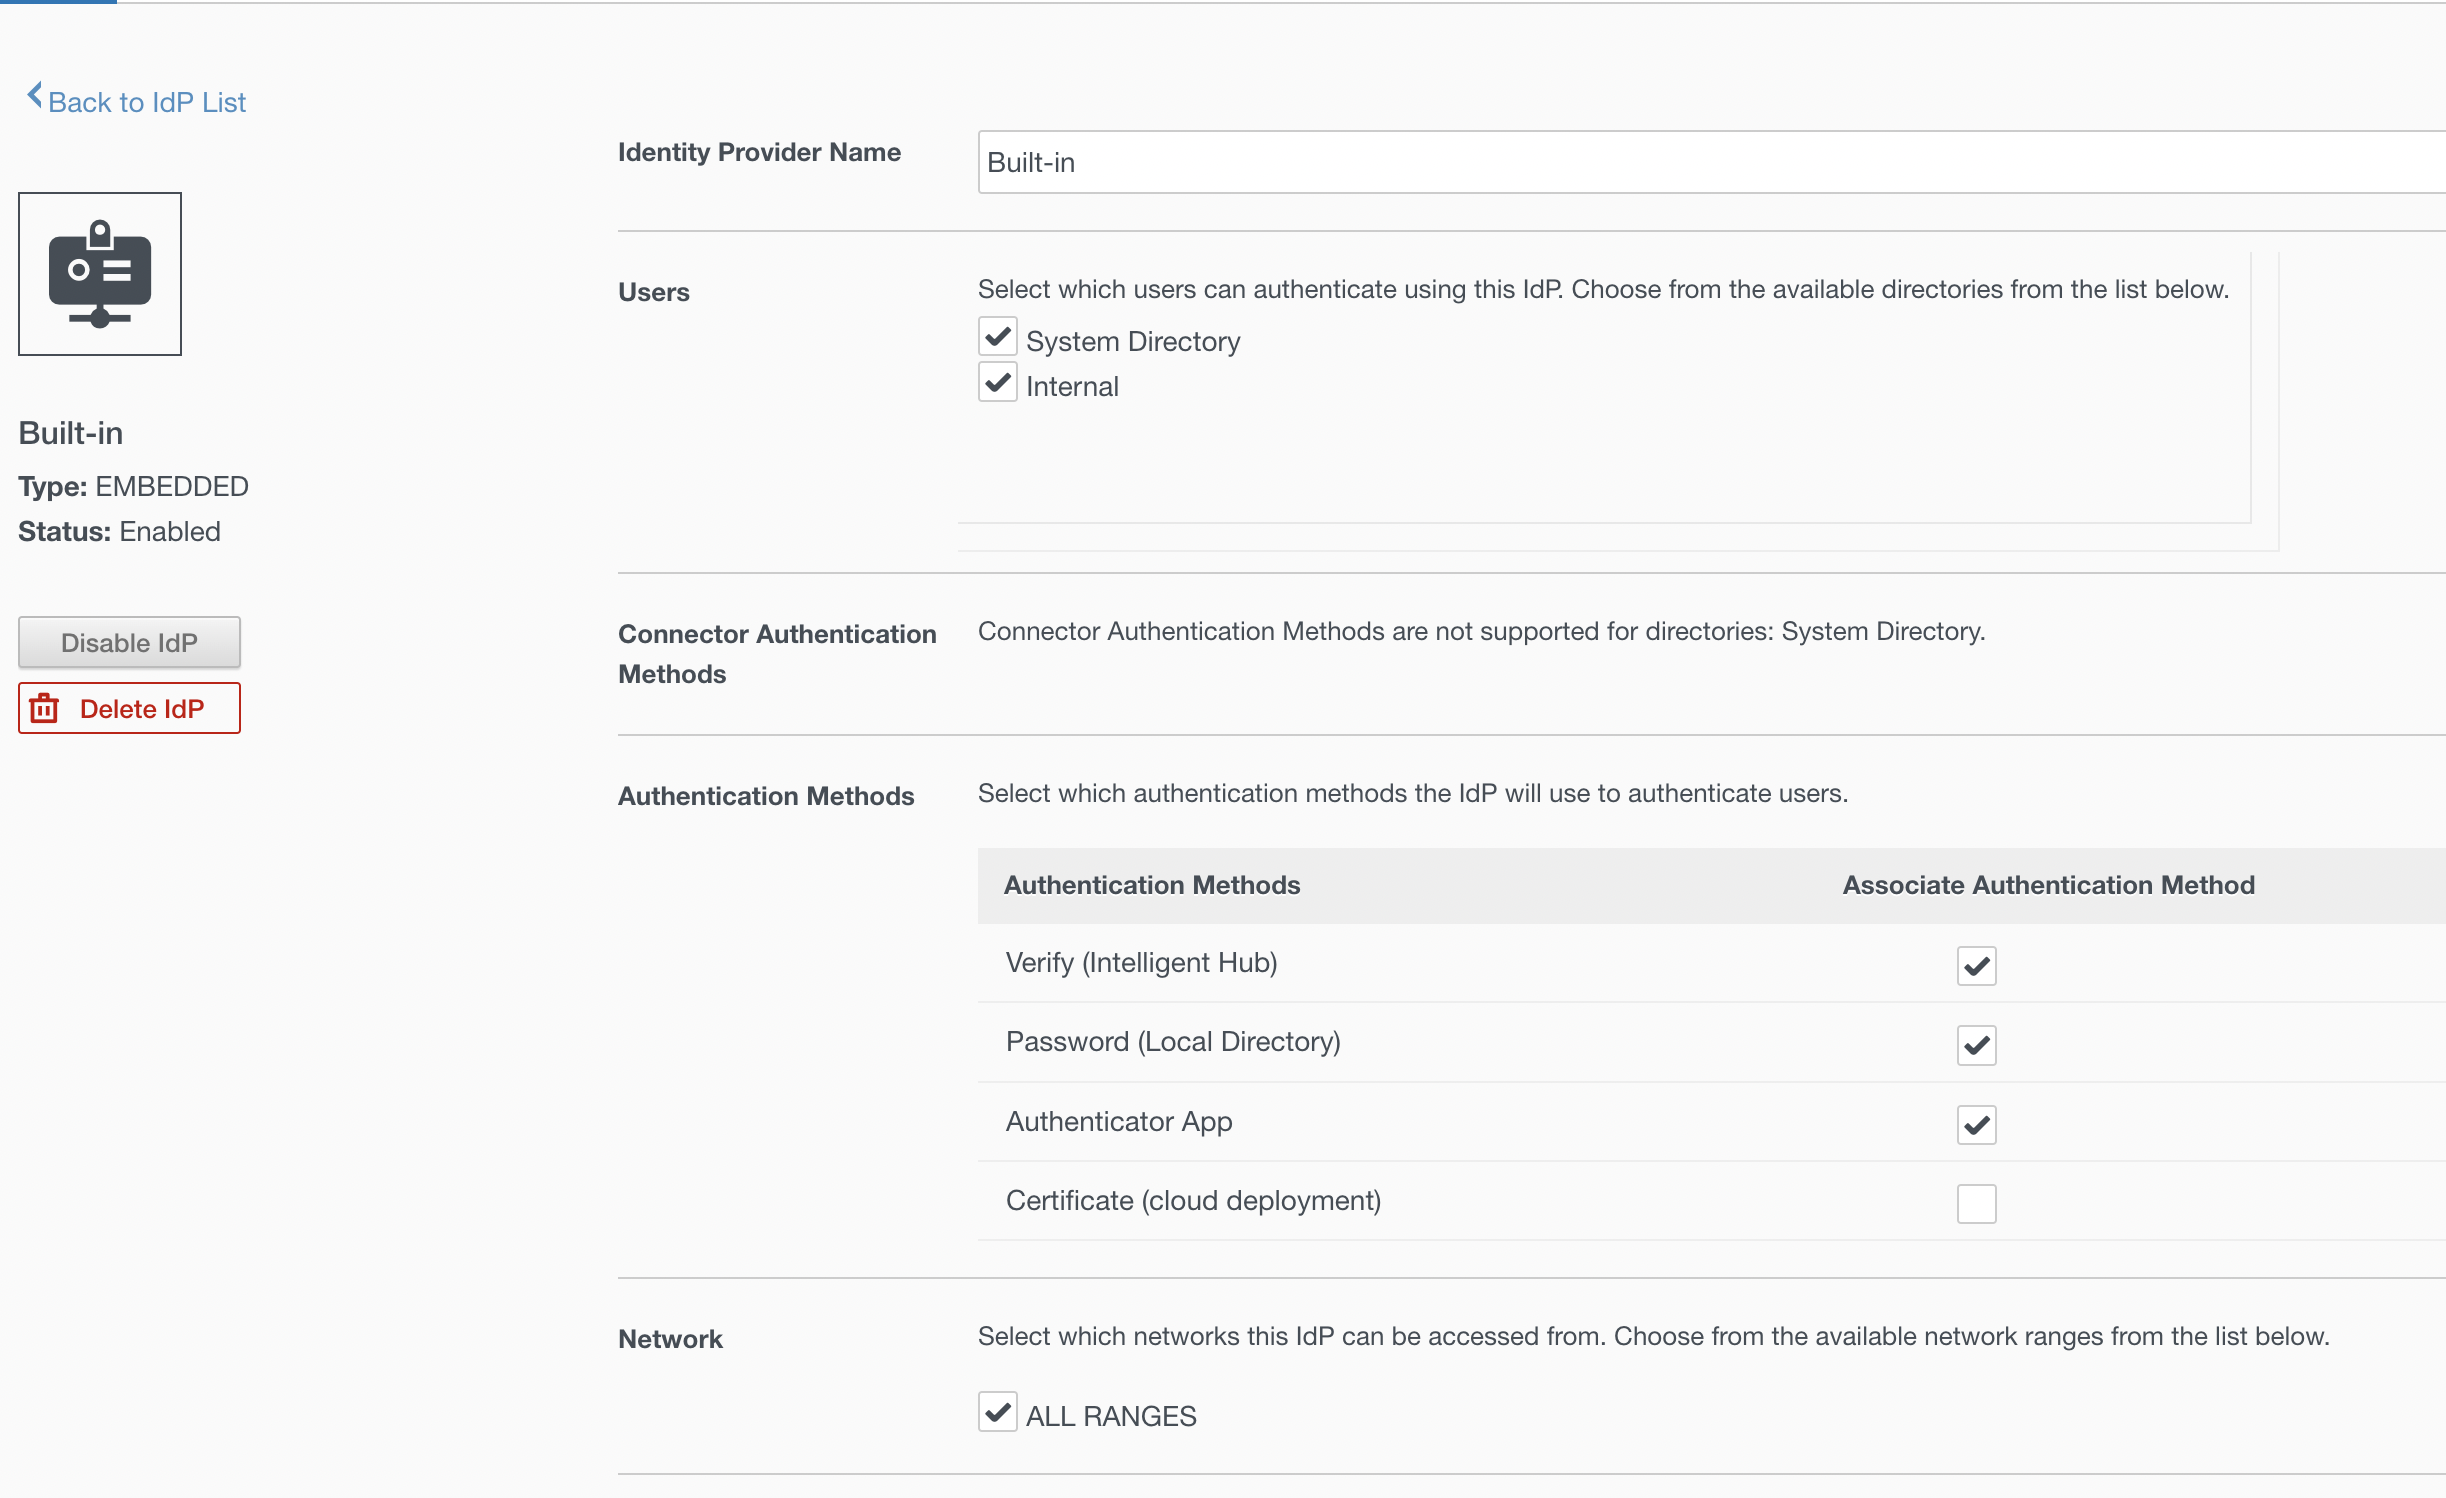
Now make sure to check the box Verify (Intelligent Hub) in your Identity Providers

Edit Policy Rule in Workspace ONE Access:
Next, add the Verify (Intelligent Hub) authentication method to your access policy.
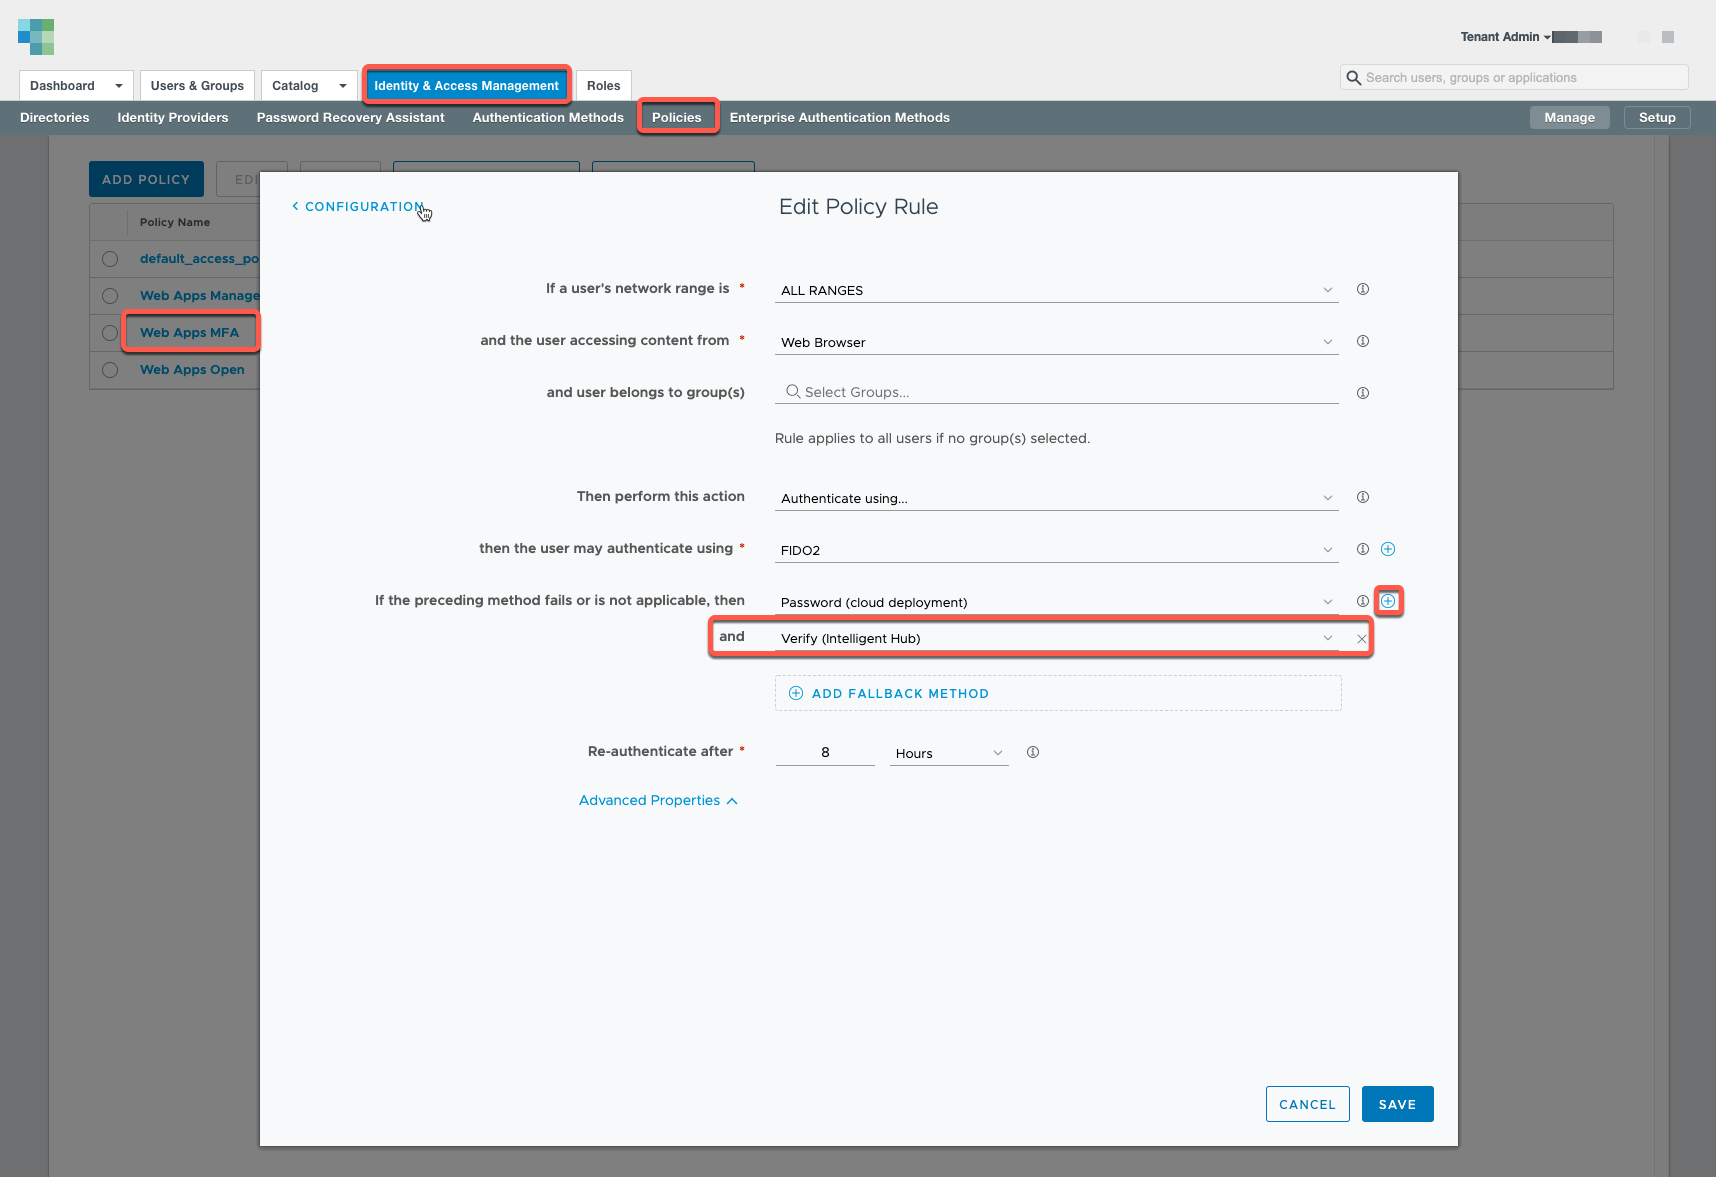
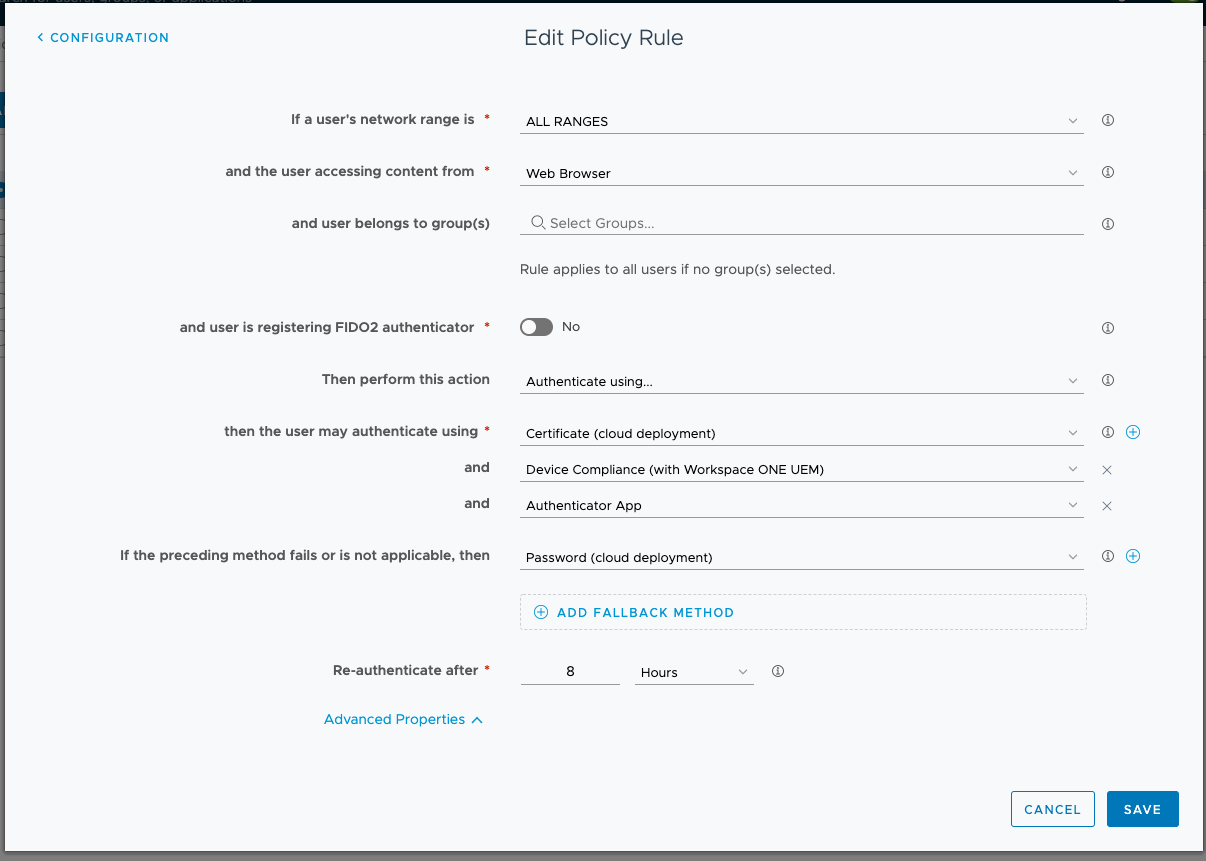
In the Workspace ONE Access admin console, navigate to Identity & Access Management > Policies and edit your Default Access Policy Set and add the authentication method to the access policy.
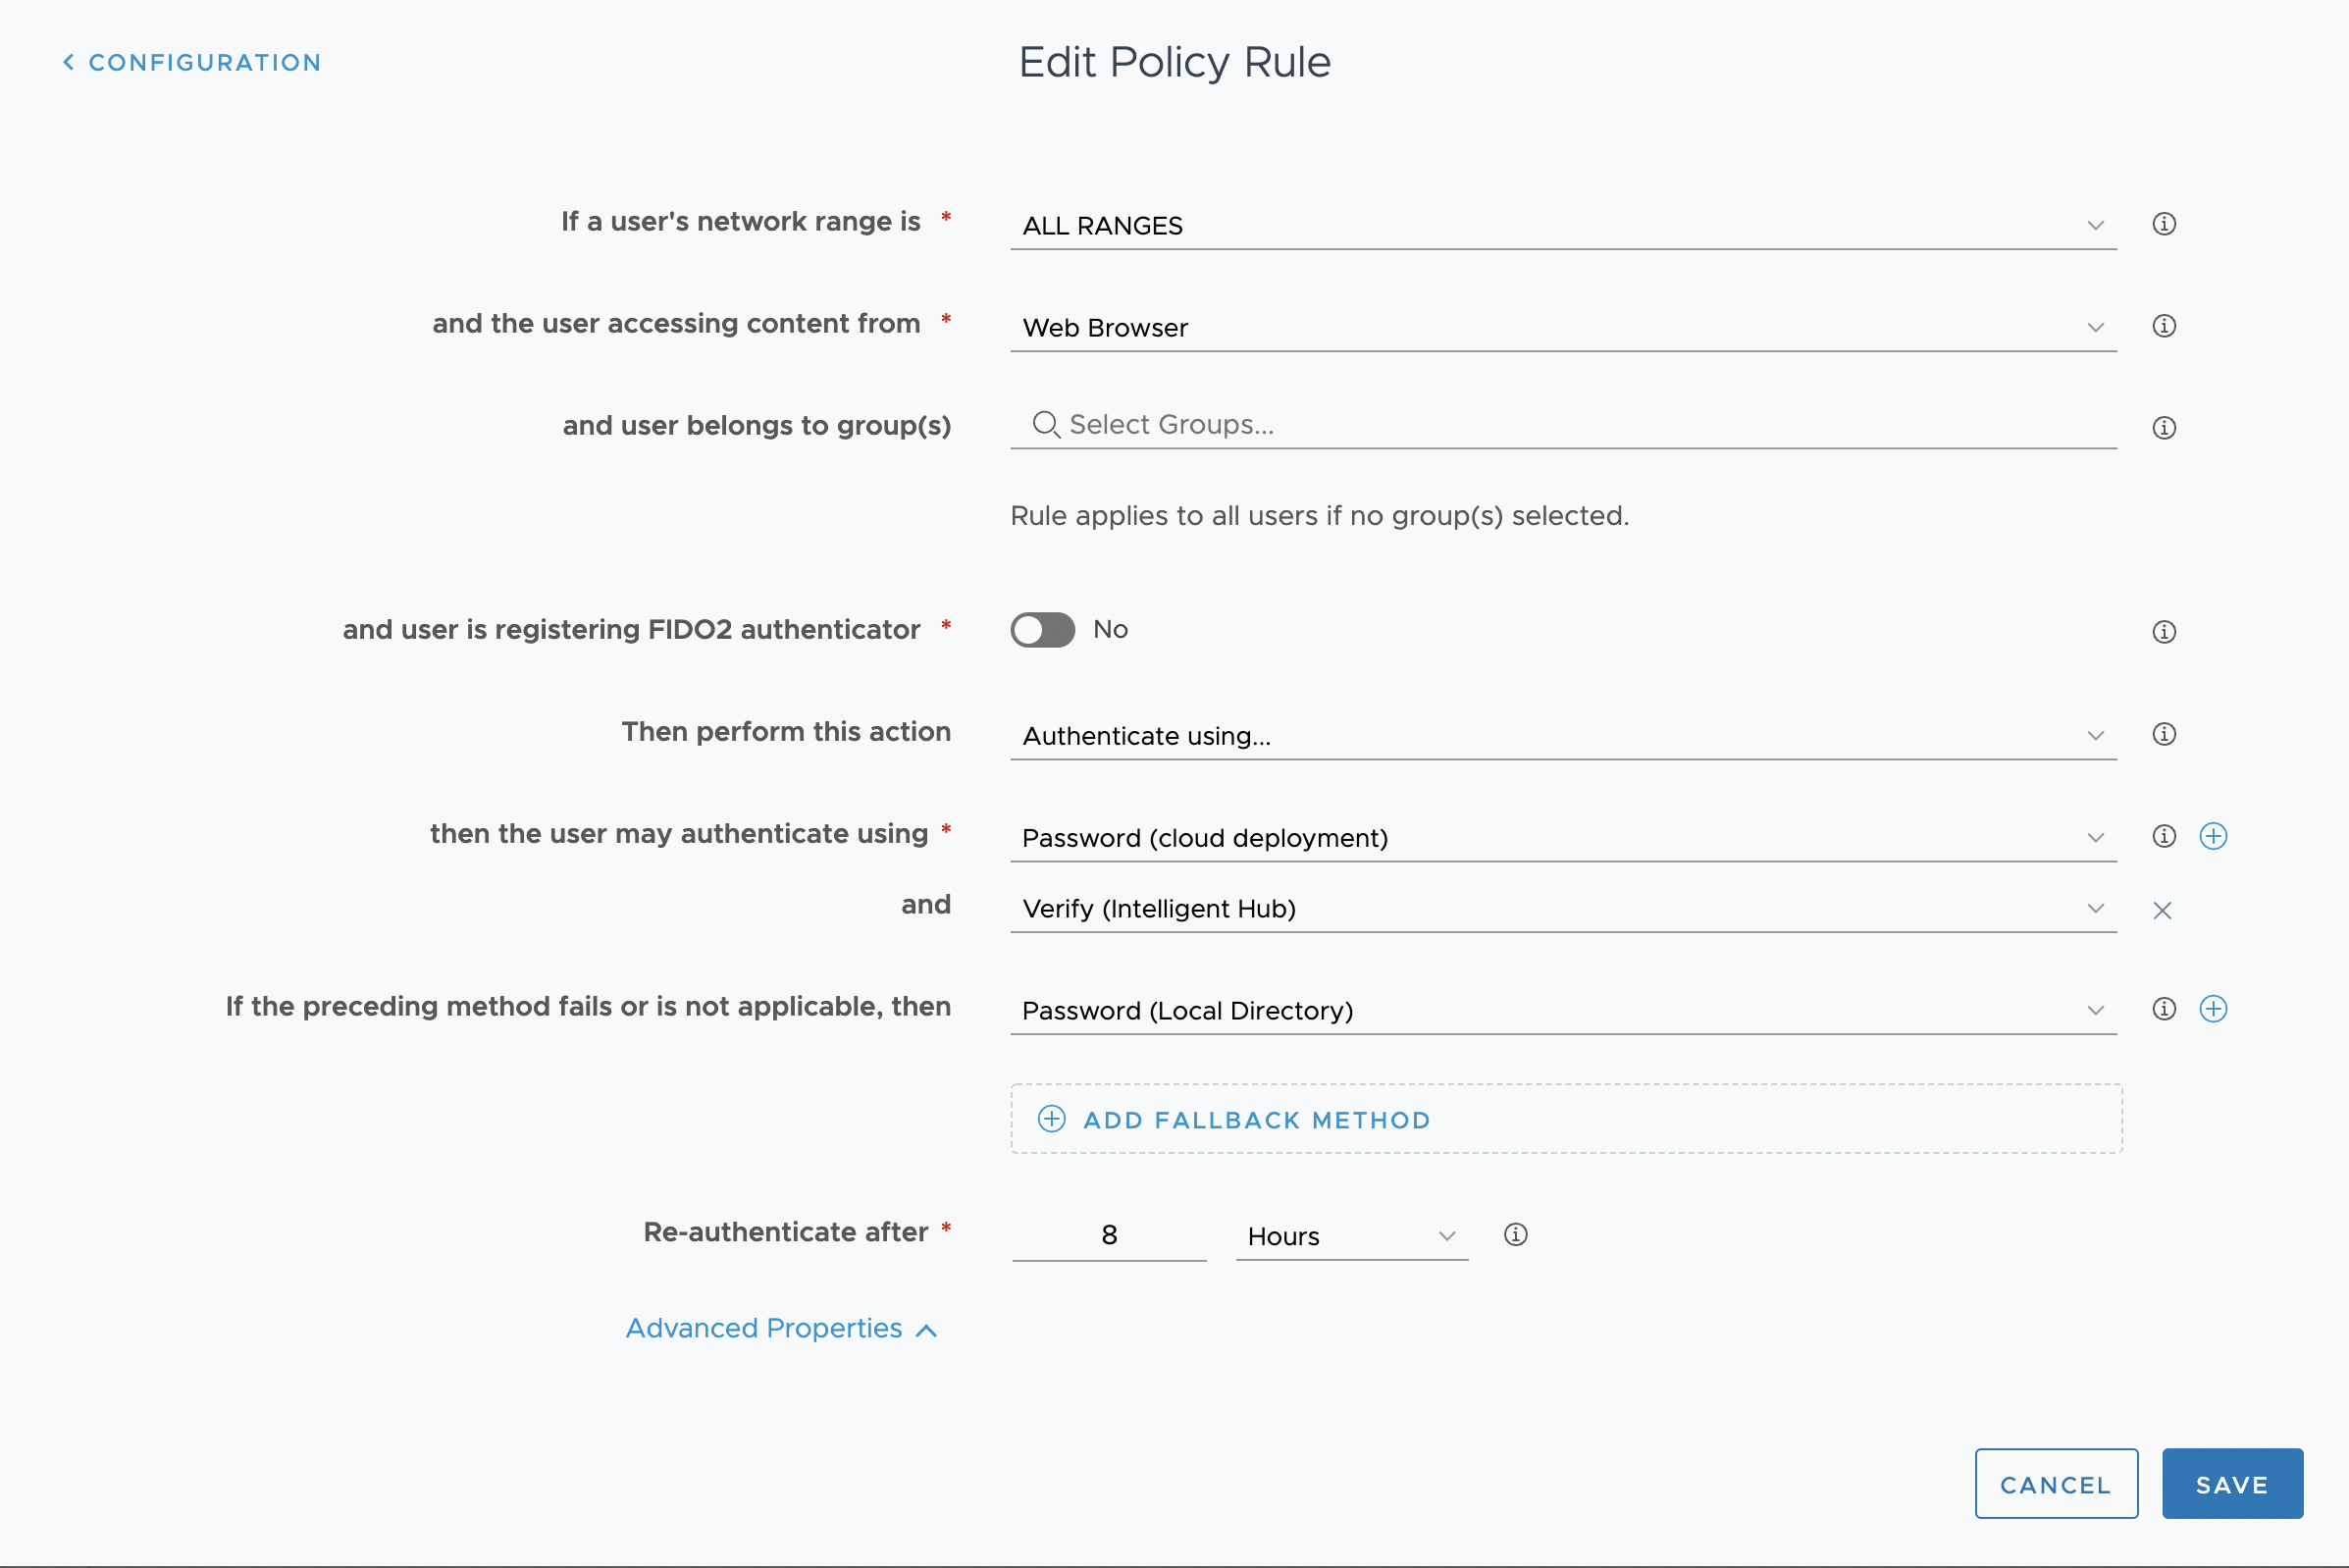
For apps that require multi-factor authentication (MFA), the authentication method can be added as a second factor.
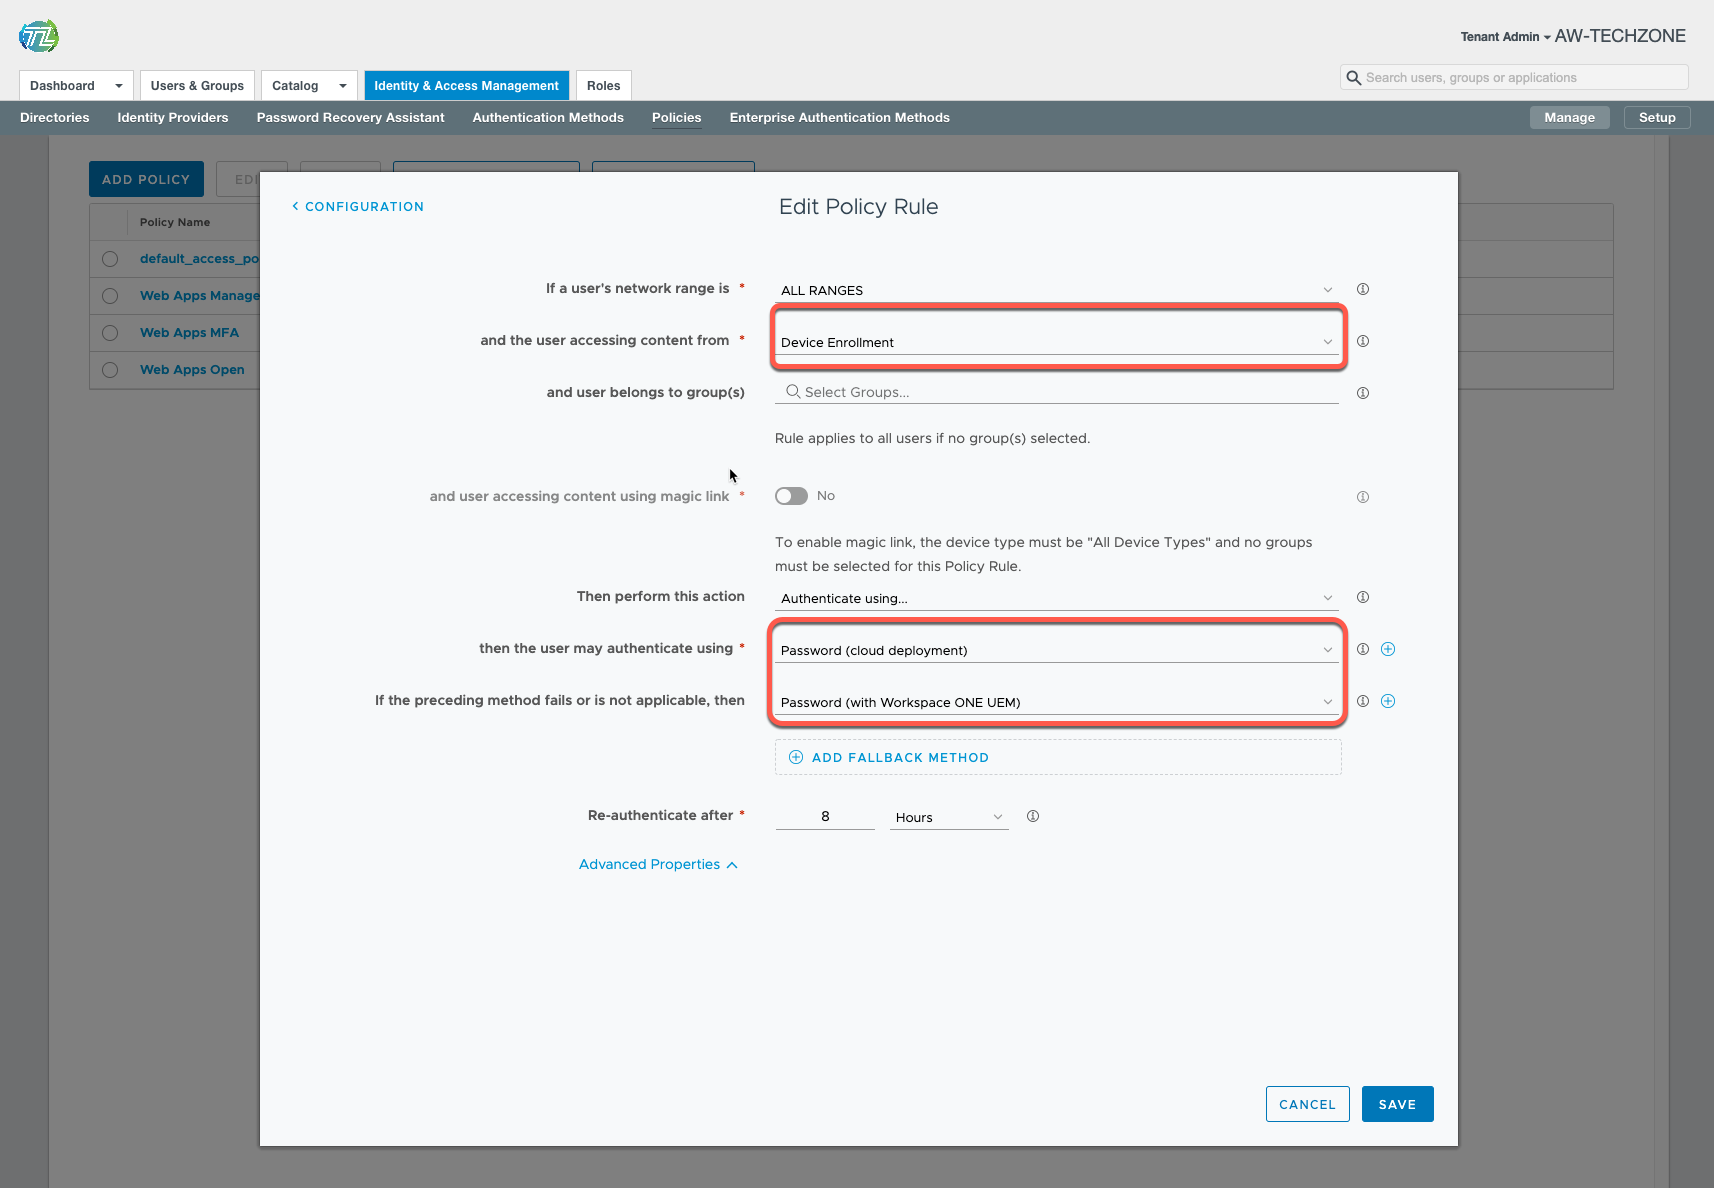
Device Enrollment Policy:
Device enrolment would fail if the user has no other device enrolled and the user is enrolling the device for the first time. For that, you could create a policy for device enrolment, skip 2FA and make sure to have it on top of other policies inside your Default Access Policy Set.
For Device Enrollment, select the authentication methods that you want, for example, password, third-party IdP, radius, and so on.
Note: If you like to use 2FA for device enrolment then you can follow the method below to use Authenticator App.
Authenticator App (TOTP):
WS1 Admin also has the option to use the Authenticator app (google authenticator, Microsoft Authenticator, etc) if you don’t want to use Intelligent Hub verify or want to use 2FA for device enrolment.
This form of 2FA is ideal for users with unmanaged devices but also works for managed device users.
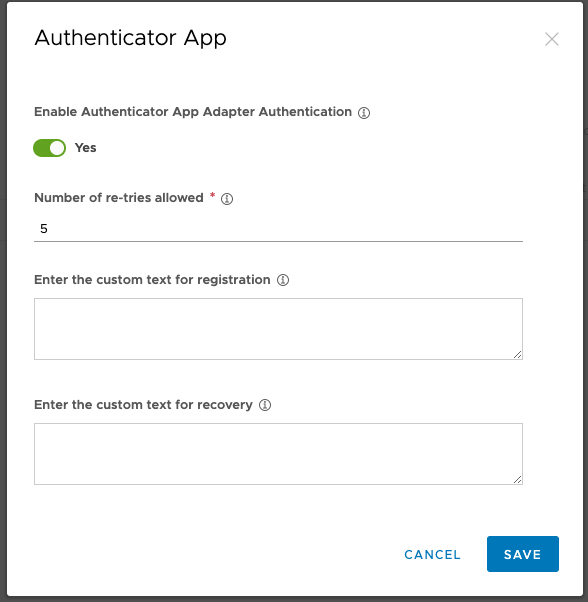
In the Workspace ONE Access admin console, navigate to Authentication Methods. Click the edit icon for Authenticator App.
Now make sure to check the box Authenticator App in your Identity Providers
Edit Policy Rule in Workspace ONE Access:
Next, add the Authenticator App authentication method to your access policy.
In the Workspace ONE Access admin console, navigate to Policies and edit your Default Access Policy Set or create a new one and add the authentication method to the access policy.
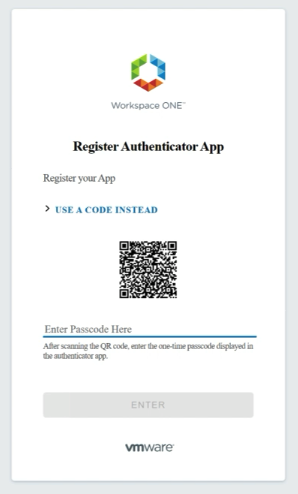
Now if a user is enrolling a device first time or accessing the WS1 User portal then the user will be presented with the below screen to register Authenticator App. You have the option to scan a barcode or enter the code in the Authenticator app.
Joined VMware in July 2015 as a consultant and worked in different BU over 7 years. Having experience in the IT industry of over 10 years with a Master's degree in IT.